Engineering
May 30, 2024
Engineering
FastTrack Guide: Receiving Notifications for Model Training Results

Jeongseok Kang
Researcher
May 30, 2024
Engineering
FastTrack Guide: Receiving Notifications for Model Training Results

Jeongseok Kang
Researcher
From the now-classic AlexNet to various large language models (LLMs) that are garnering a lot of attention these days, we train and evaluate various models to suit our needs. However, realistically, it's difficult for us to gauge when the training will end until we run the model multiple times and gain experience.
Backend.AI's excellent scheduling minimizes GPU idle time and allows model training to run even while we sleep. Then, what if we could receive the results of a model that finished training while we were asleep? In this article, we'll cover how to receive model training results as messages via Slack, using the new feature of FastTrack.
This article is based on the Backend.AI FastTrack version 24.03.3.
Before We Start
This article does not cover how to create a Slack App and Bot. For detailed information, we recommend referring to the official documentation.
Creating a Pipeline
Let's create a pipeline for model training. A pipeline is a unit of work used in FastTrack. Each pipeline can be expressed as a collection of tasks, the minimum execution unit. Multiple tasks included in a single pipeline can have interdependencies, and they are executed sequentially according to these dependencies. Resource allocation can be set for each task, allowing flexible resource management.
When an execution command is sent to a pipeline, it is executed by replicating the exact state at that point, and this unit is called a pipeline job. Multiple pipeline jobs can be run from a single pipeline, and each pipeline job is generated from a single pipeline.
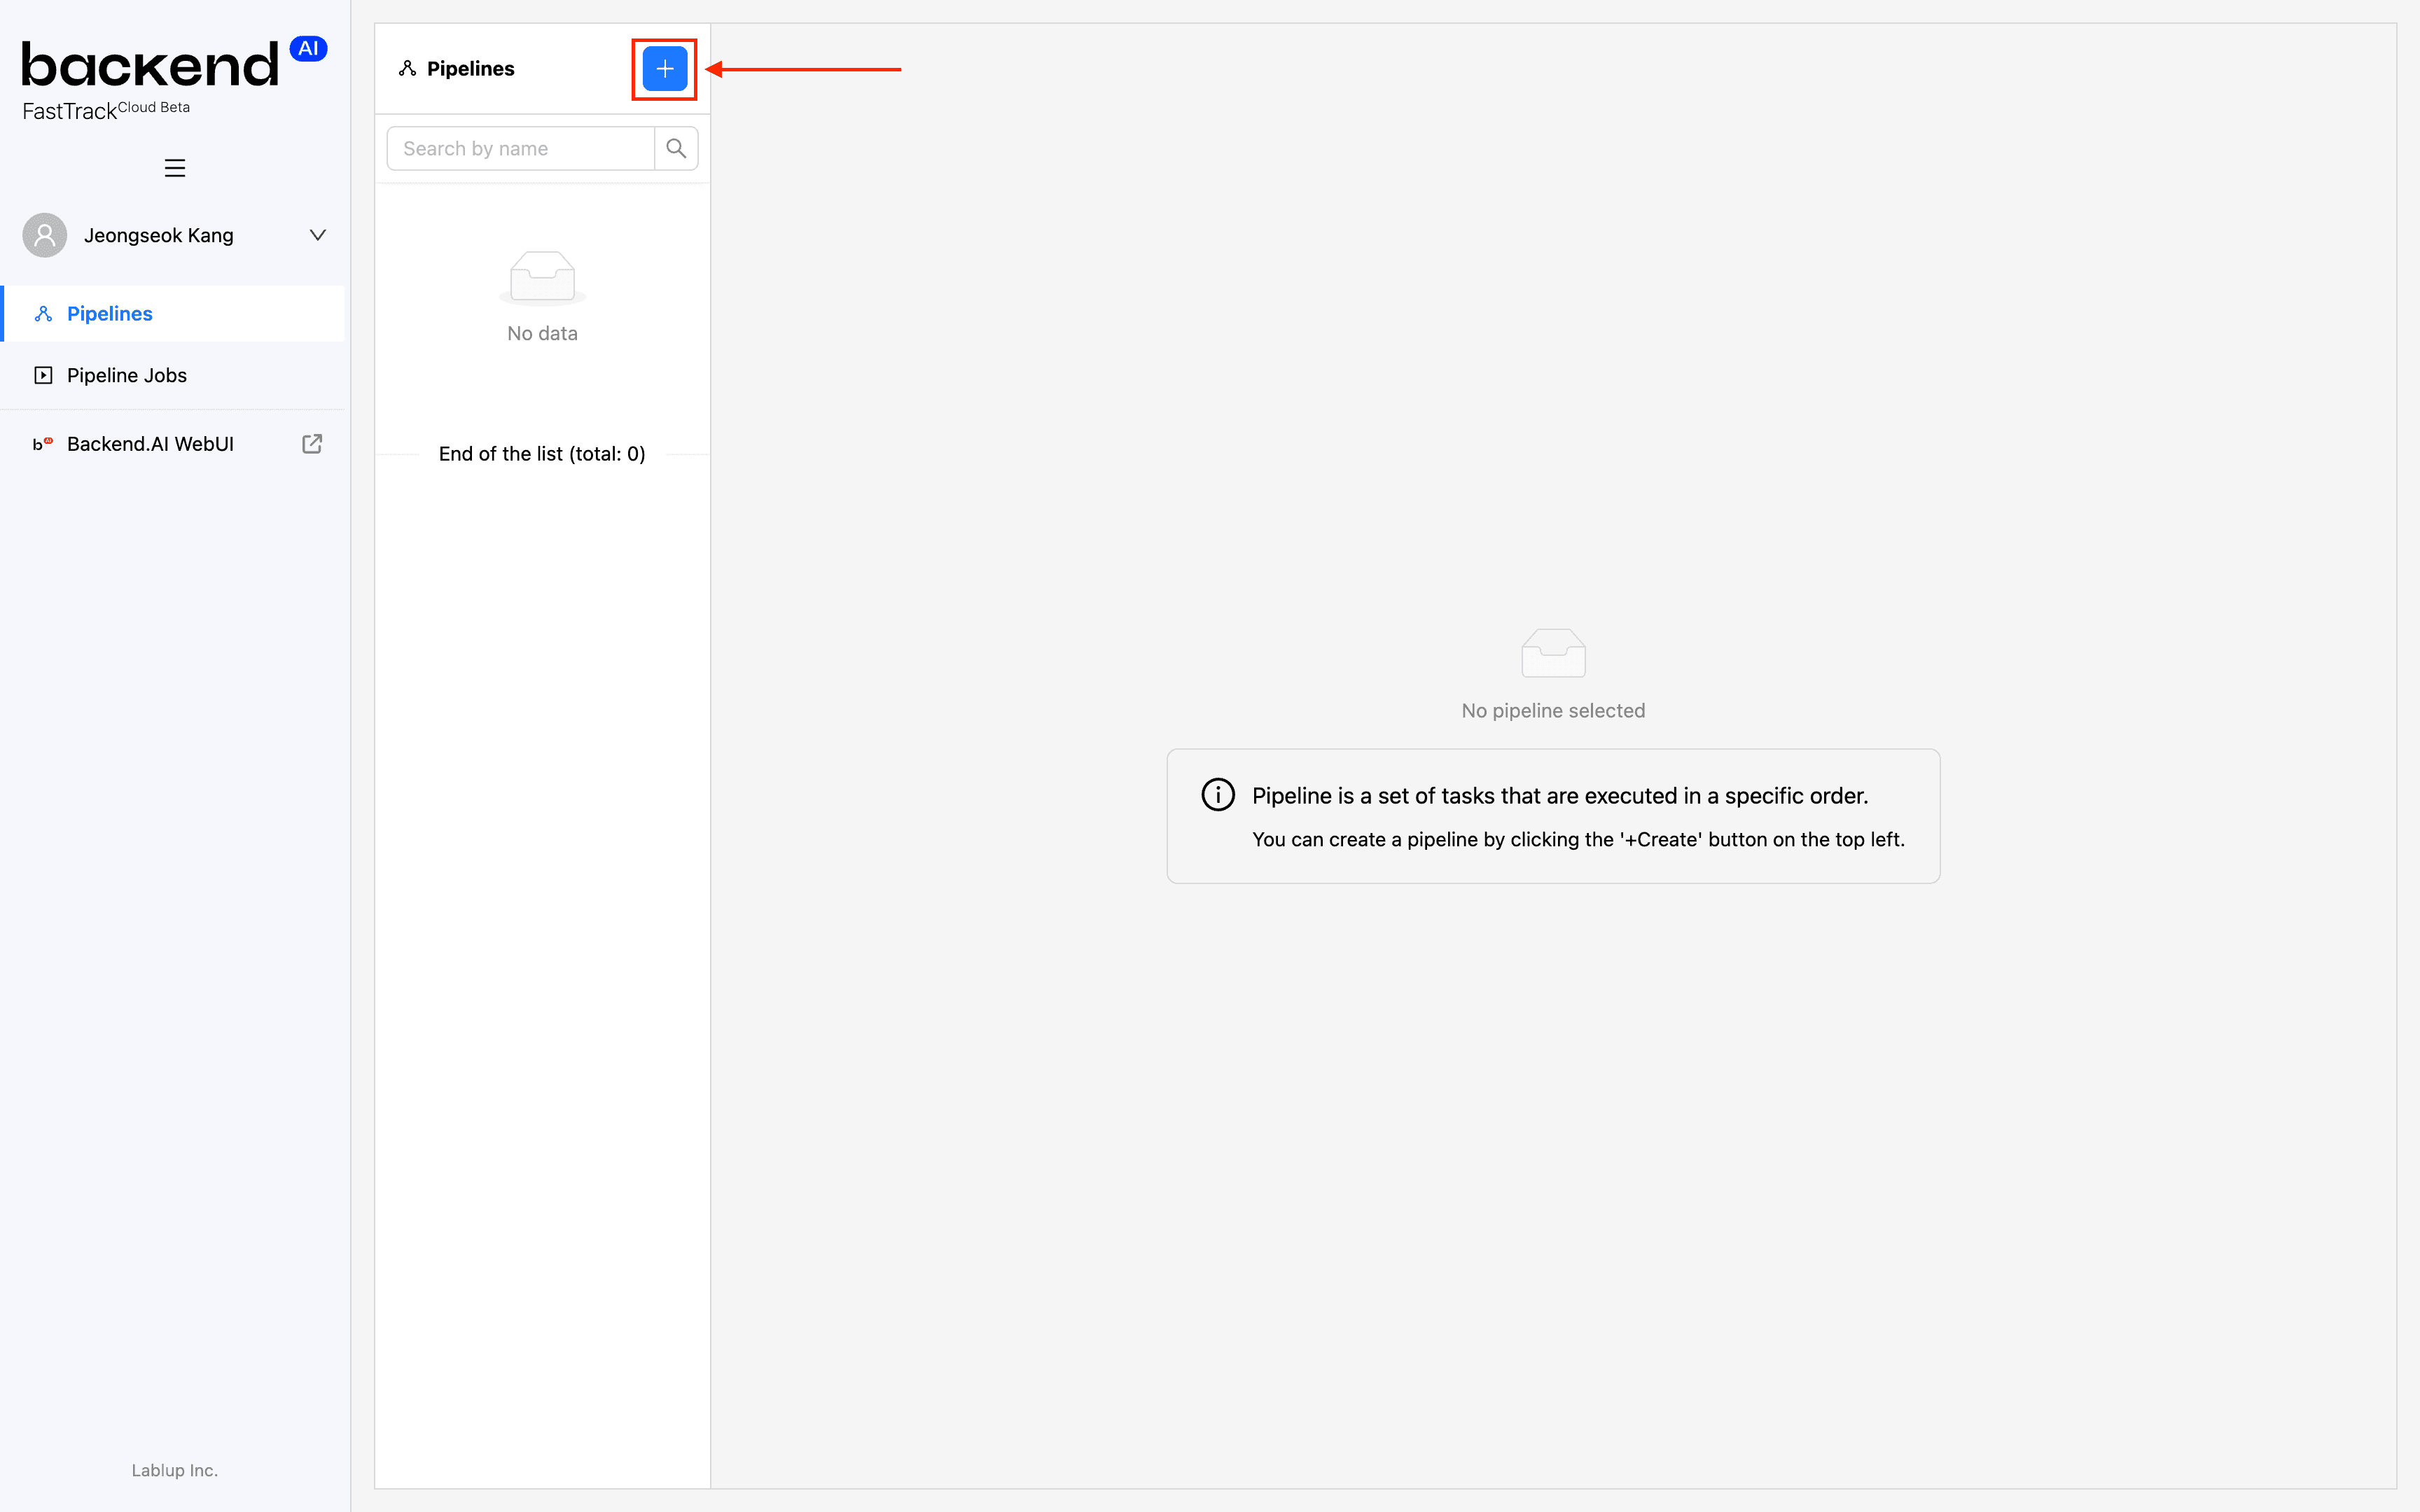
Create Pipeline button
Click the Create Pipeline button ("+") at the top of the pipeline list.
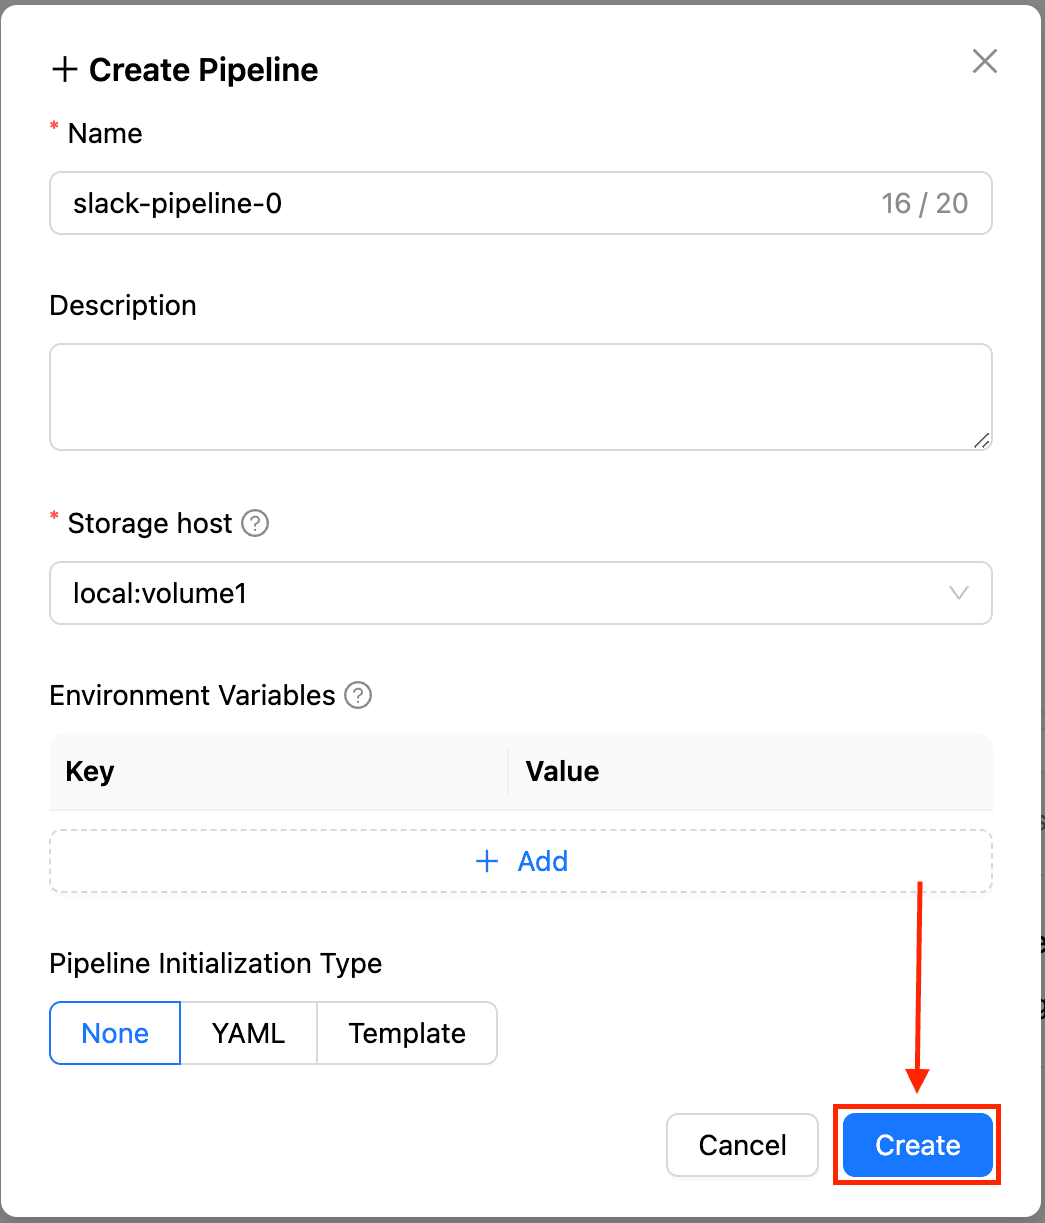
Creating a Pipeline
You can specify the pipeline's name, description, location of the data store to use, environment variables to be applied commonly across the pipeline, and the method of pipeline initialization. Enter the name "slack-pipeline-0", and then click the "Create" button at the bottom to create the pipeline.
Creating Tasks
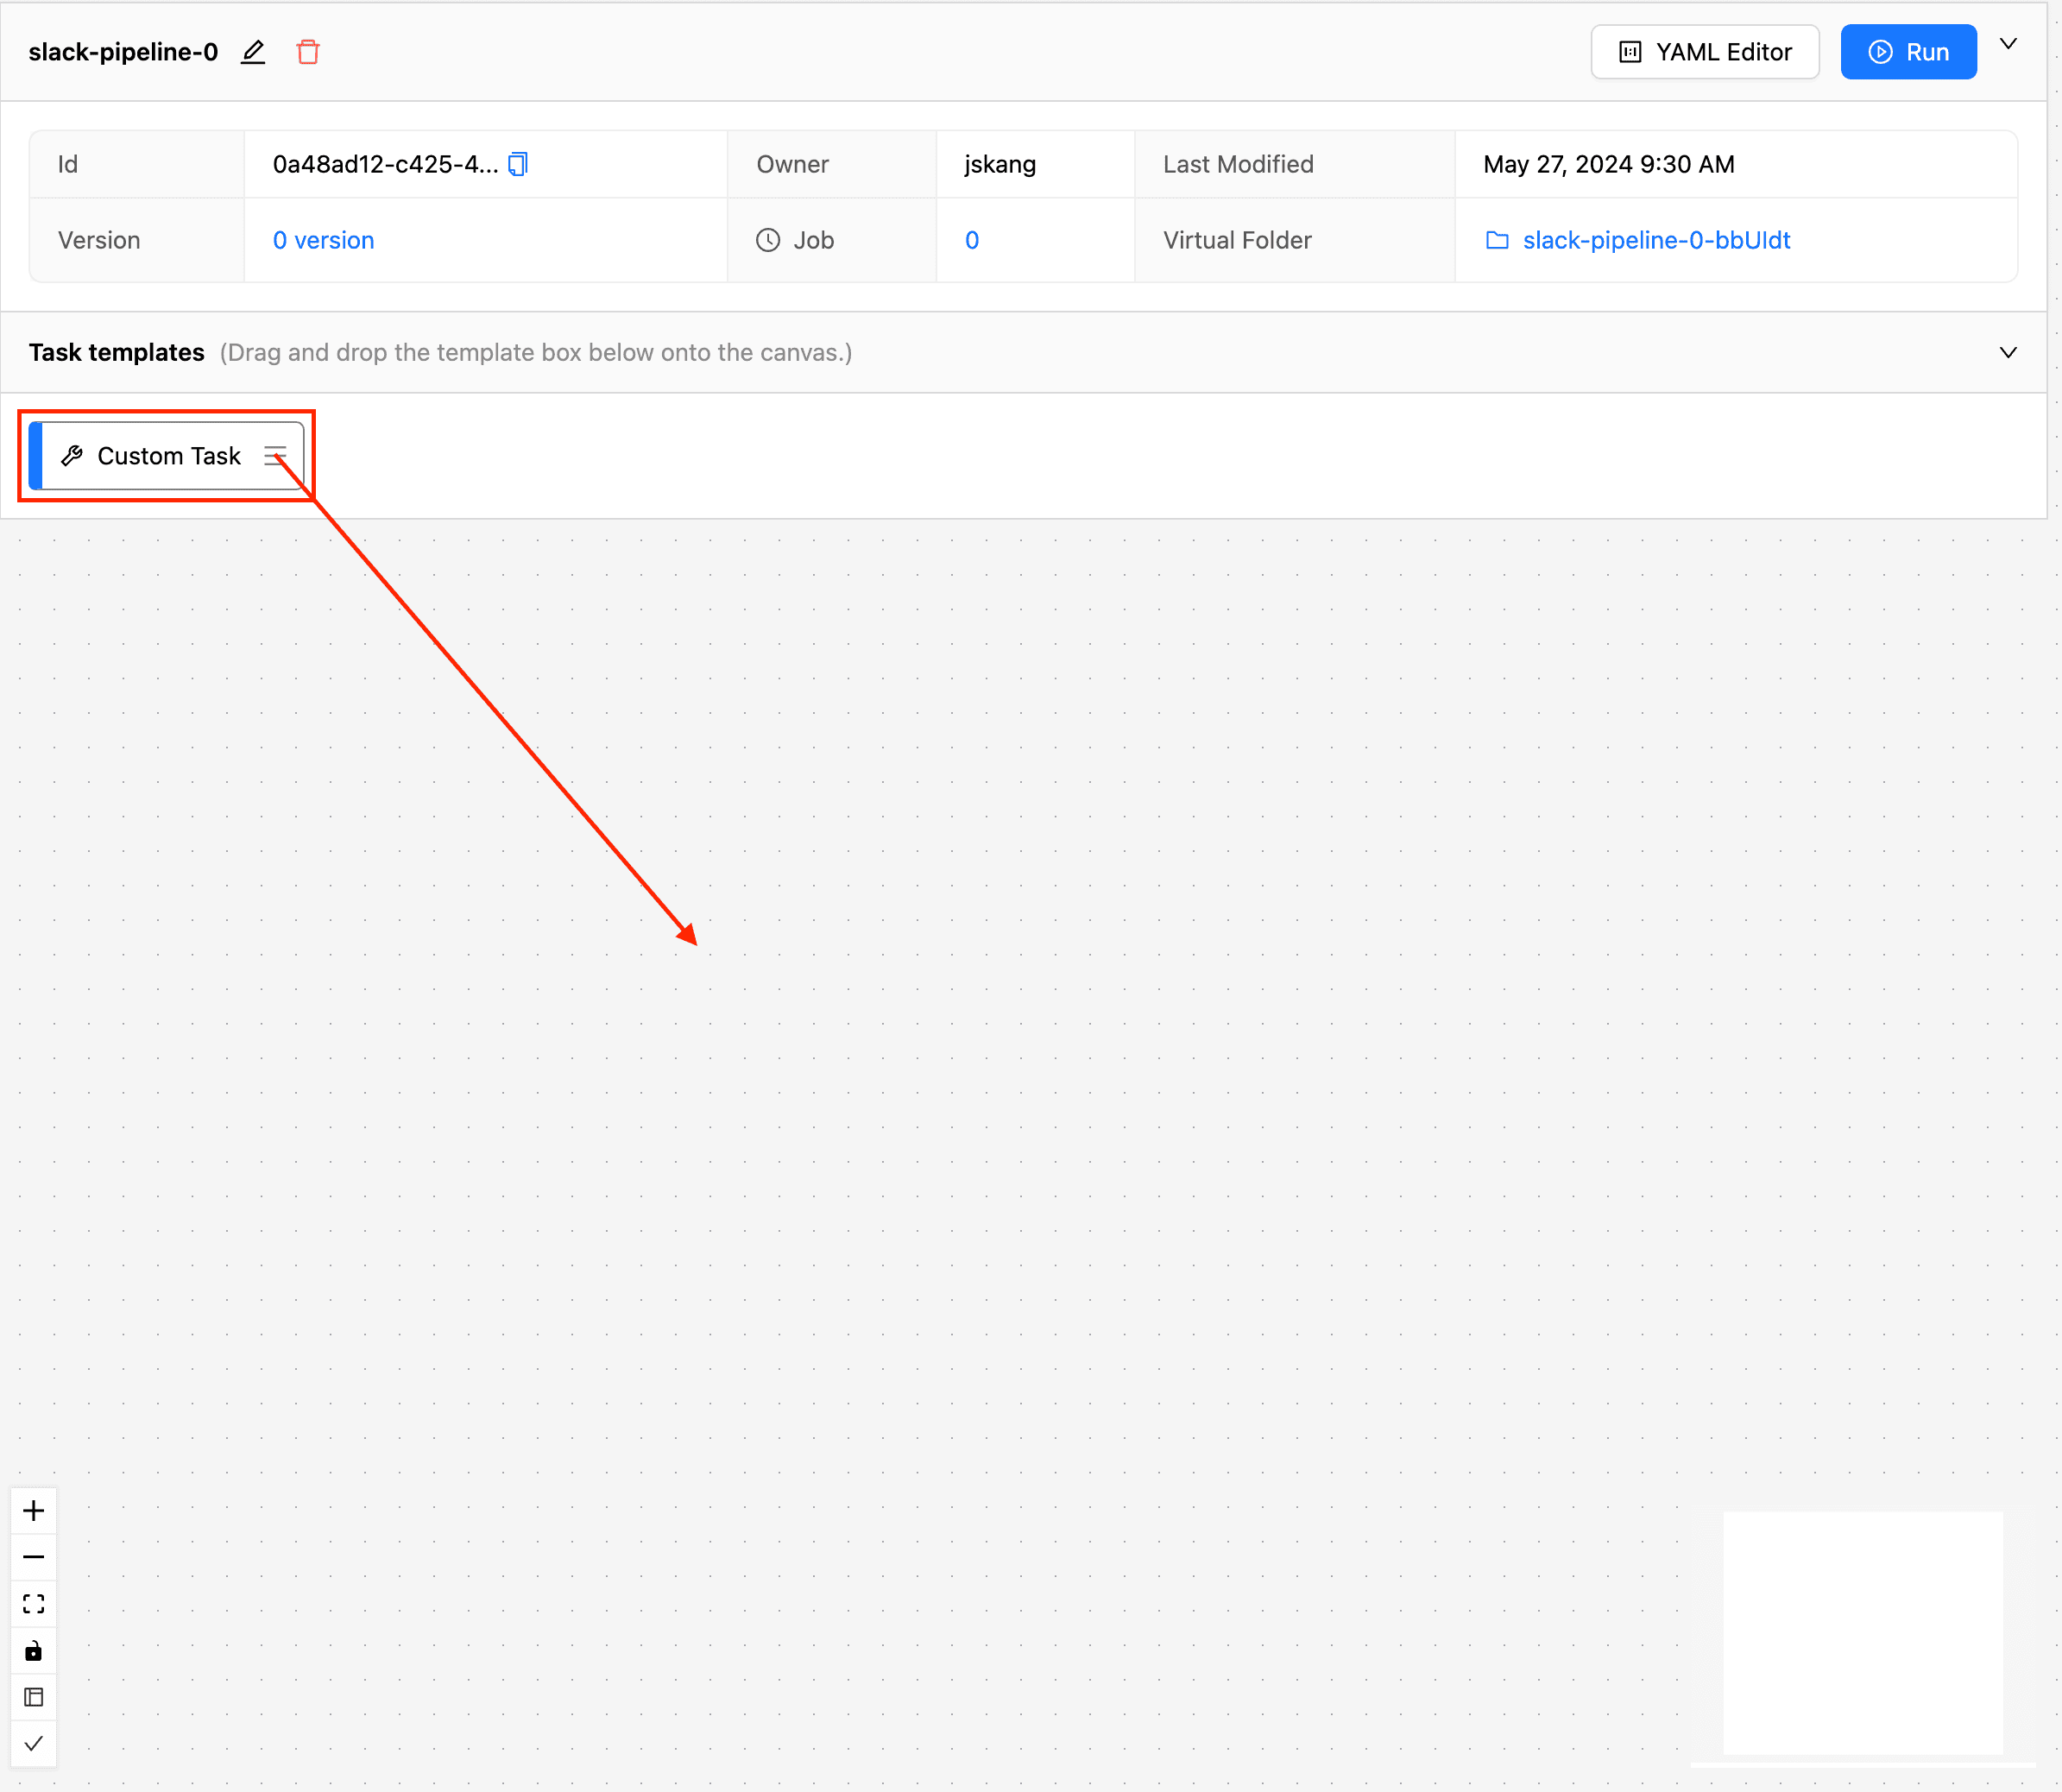
Dragging a Task
You can see that the new pipeline has been created. Now let's add some tasks. From the task template list (Task templates) at the top, drag and drop the "Custom Task" block onto the workspace below.
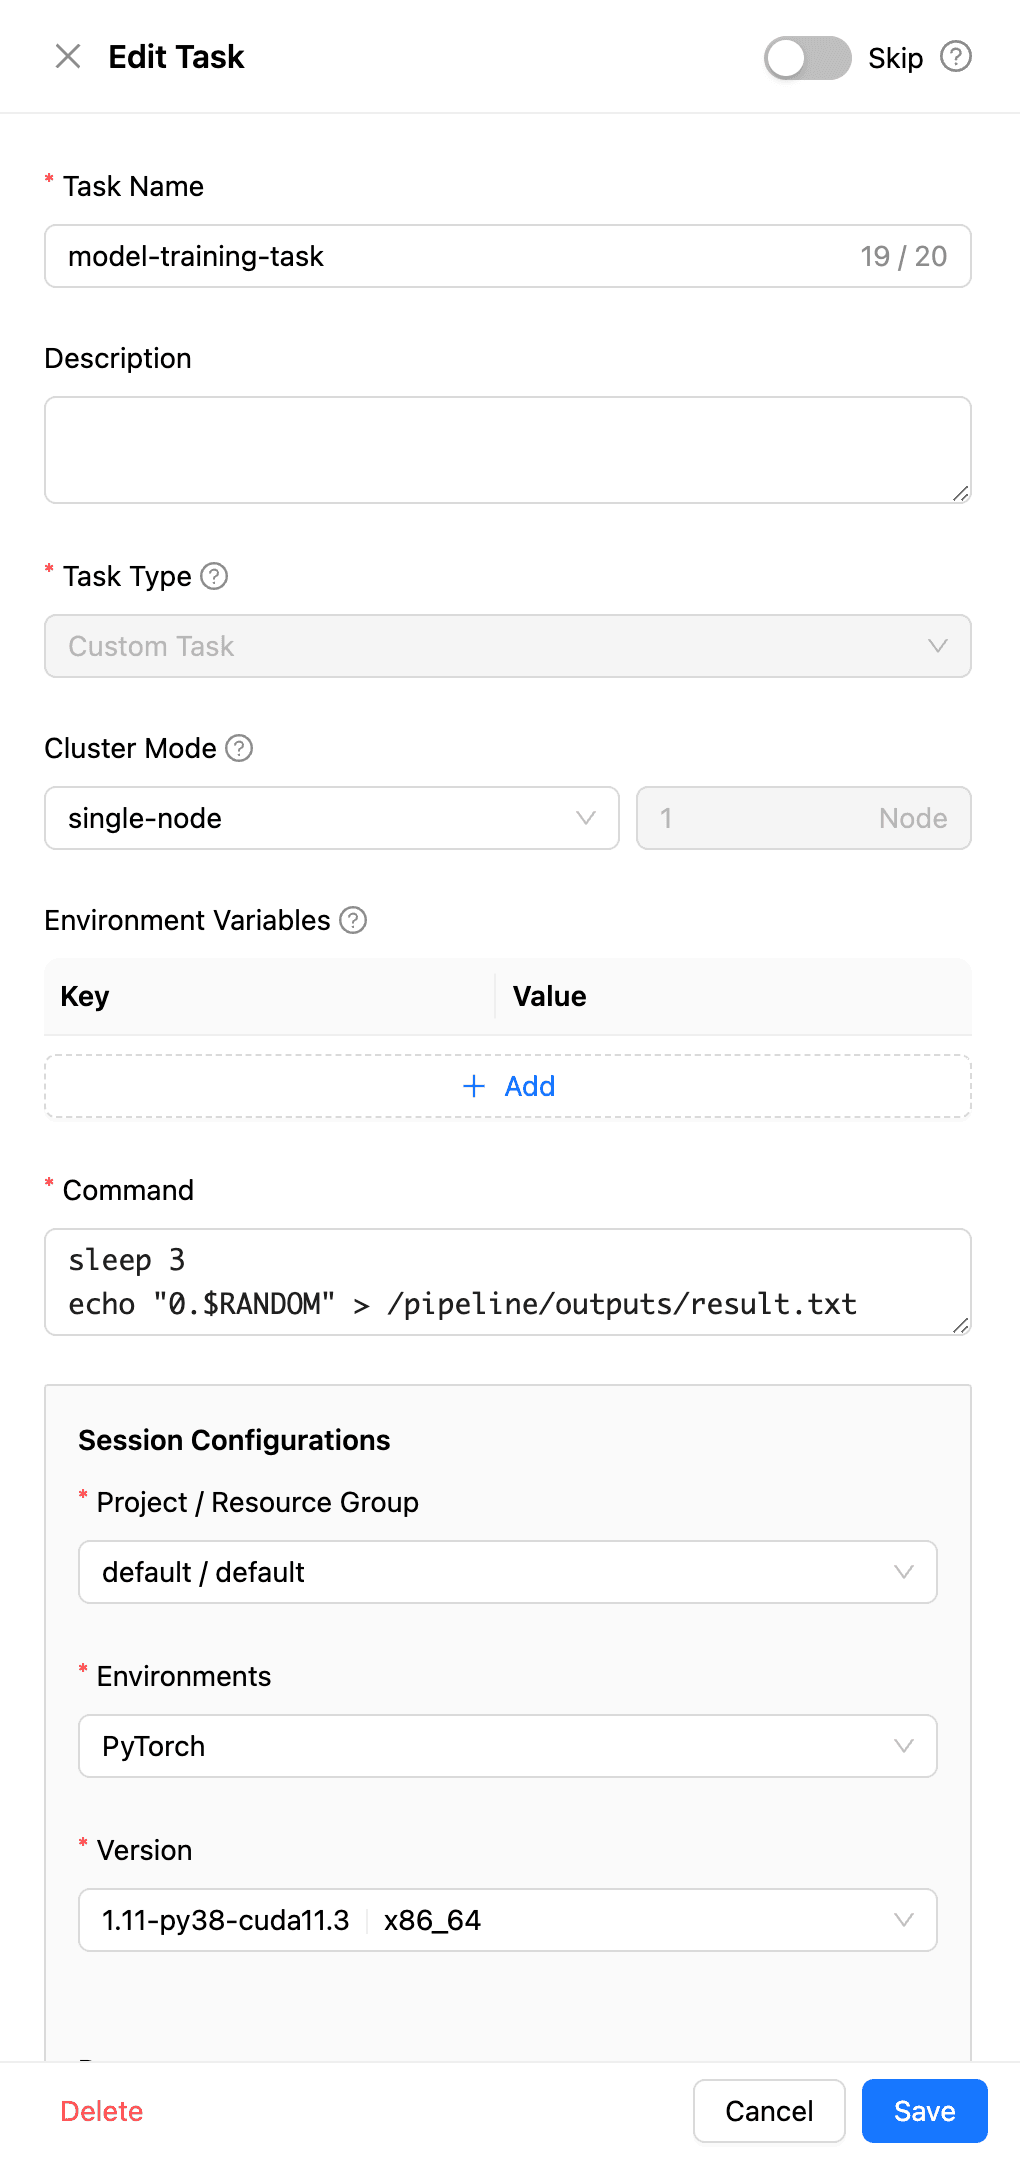
Entering the Task's Actions
A task details window appears on the right where you can enter the task's specifics. You can give it a name like model-training-task to indicate its role, and set it to use the pytorch:1.11-py38-cuda11.3 image for model training. Since actual model training can take a long time, for this example, we'll have it execute the following simple commands:
# Pause for 3 seconds to increase the execution time.
sleep 3
# Create a `result.txt` file in the pipeline-dedicated folder. Assume this is the accuracy of the trained model.
echo "0.$RANDOM" > /pipeline/outputs/result.txt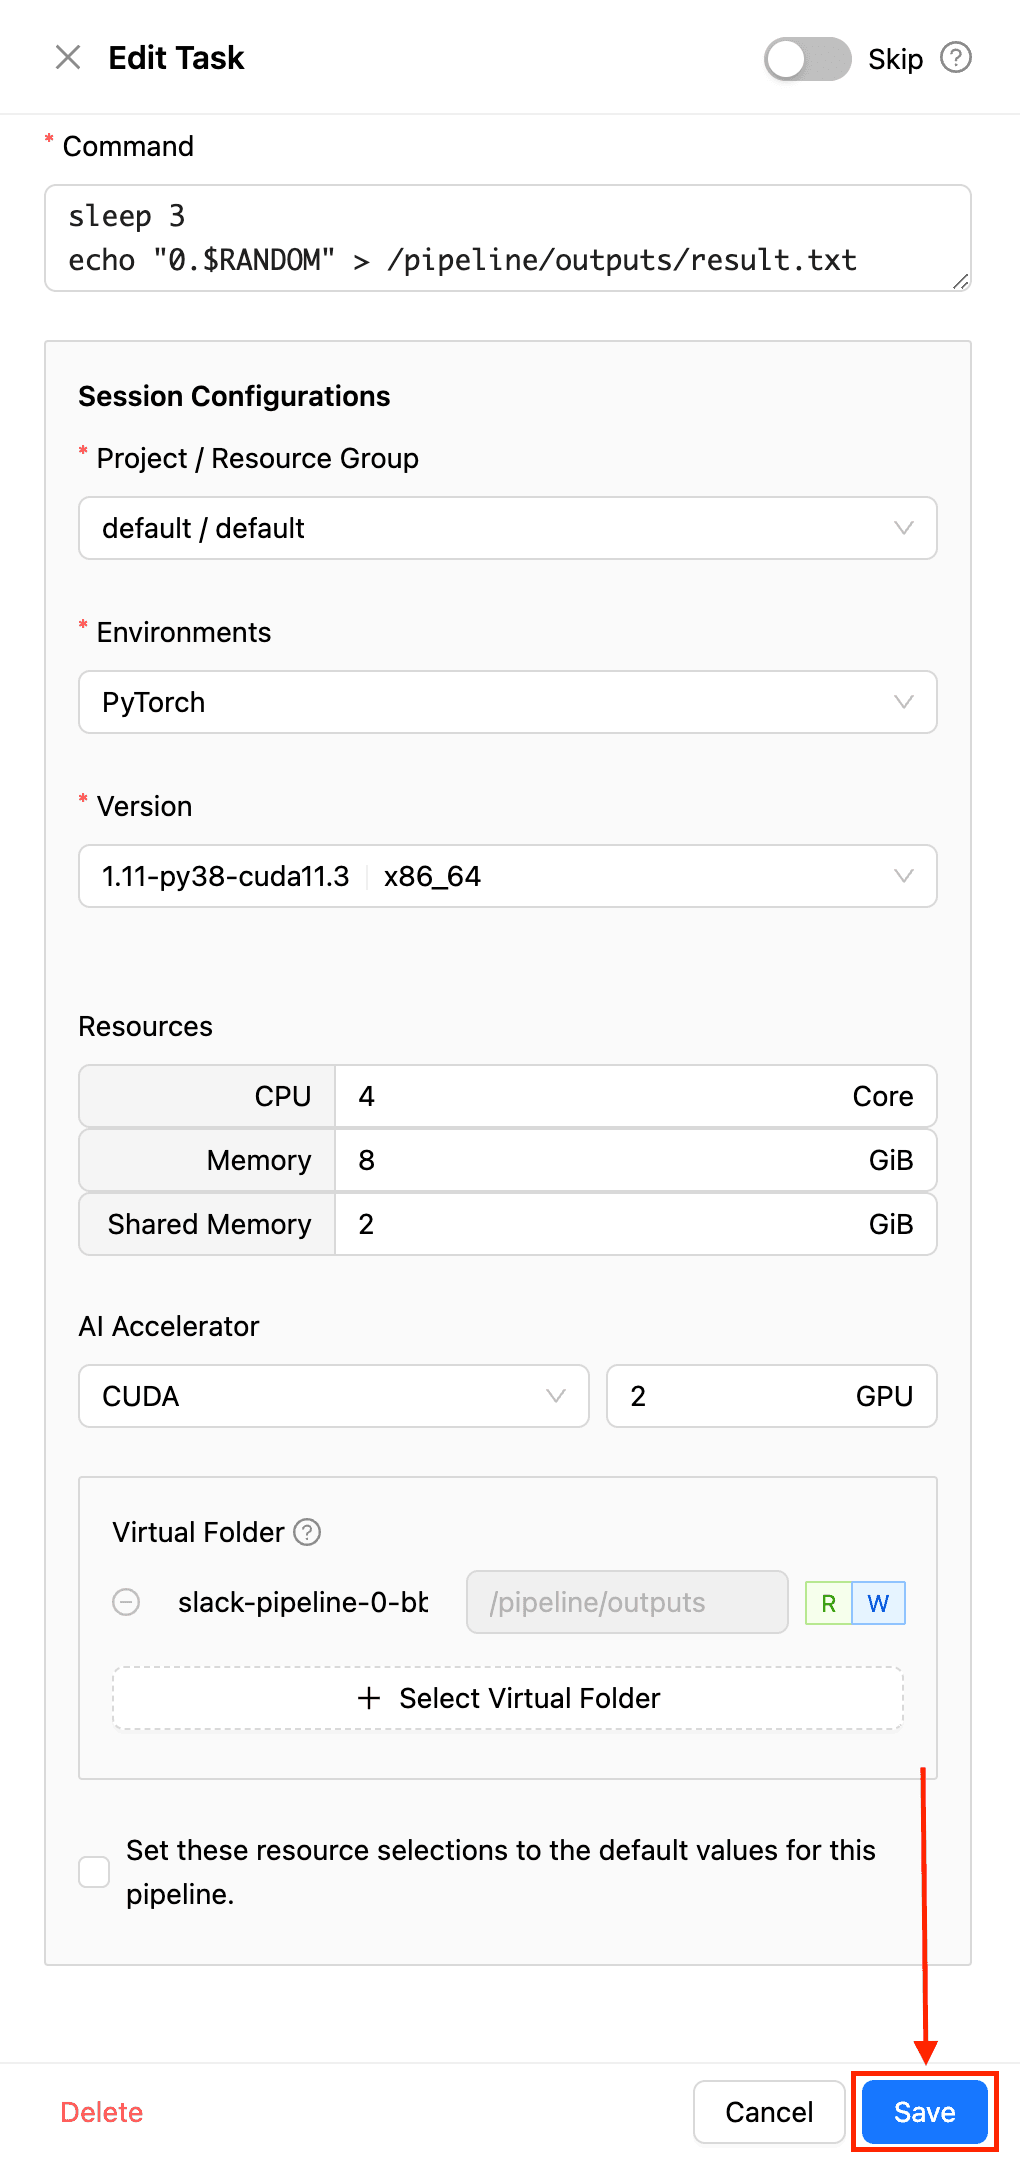
Creating a Task (1)
Finally, enter the resource allocation for the task, and then click the "Save" button at the bottom to create the task.
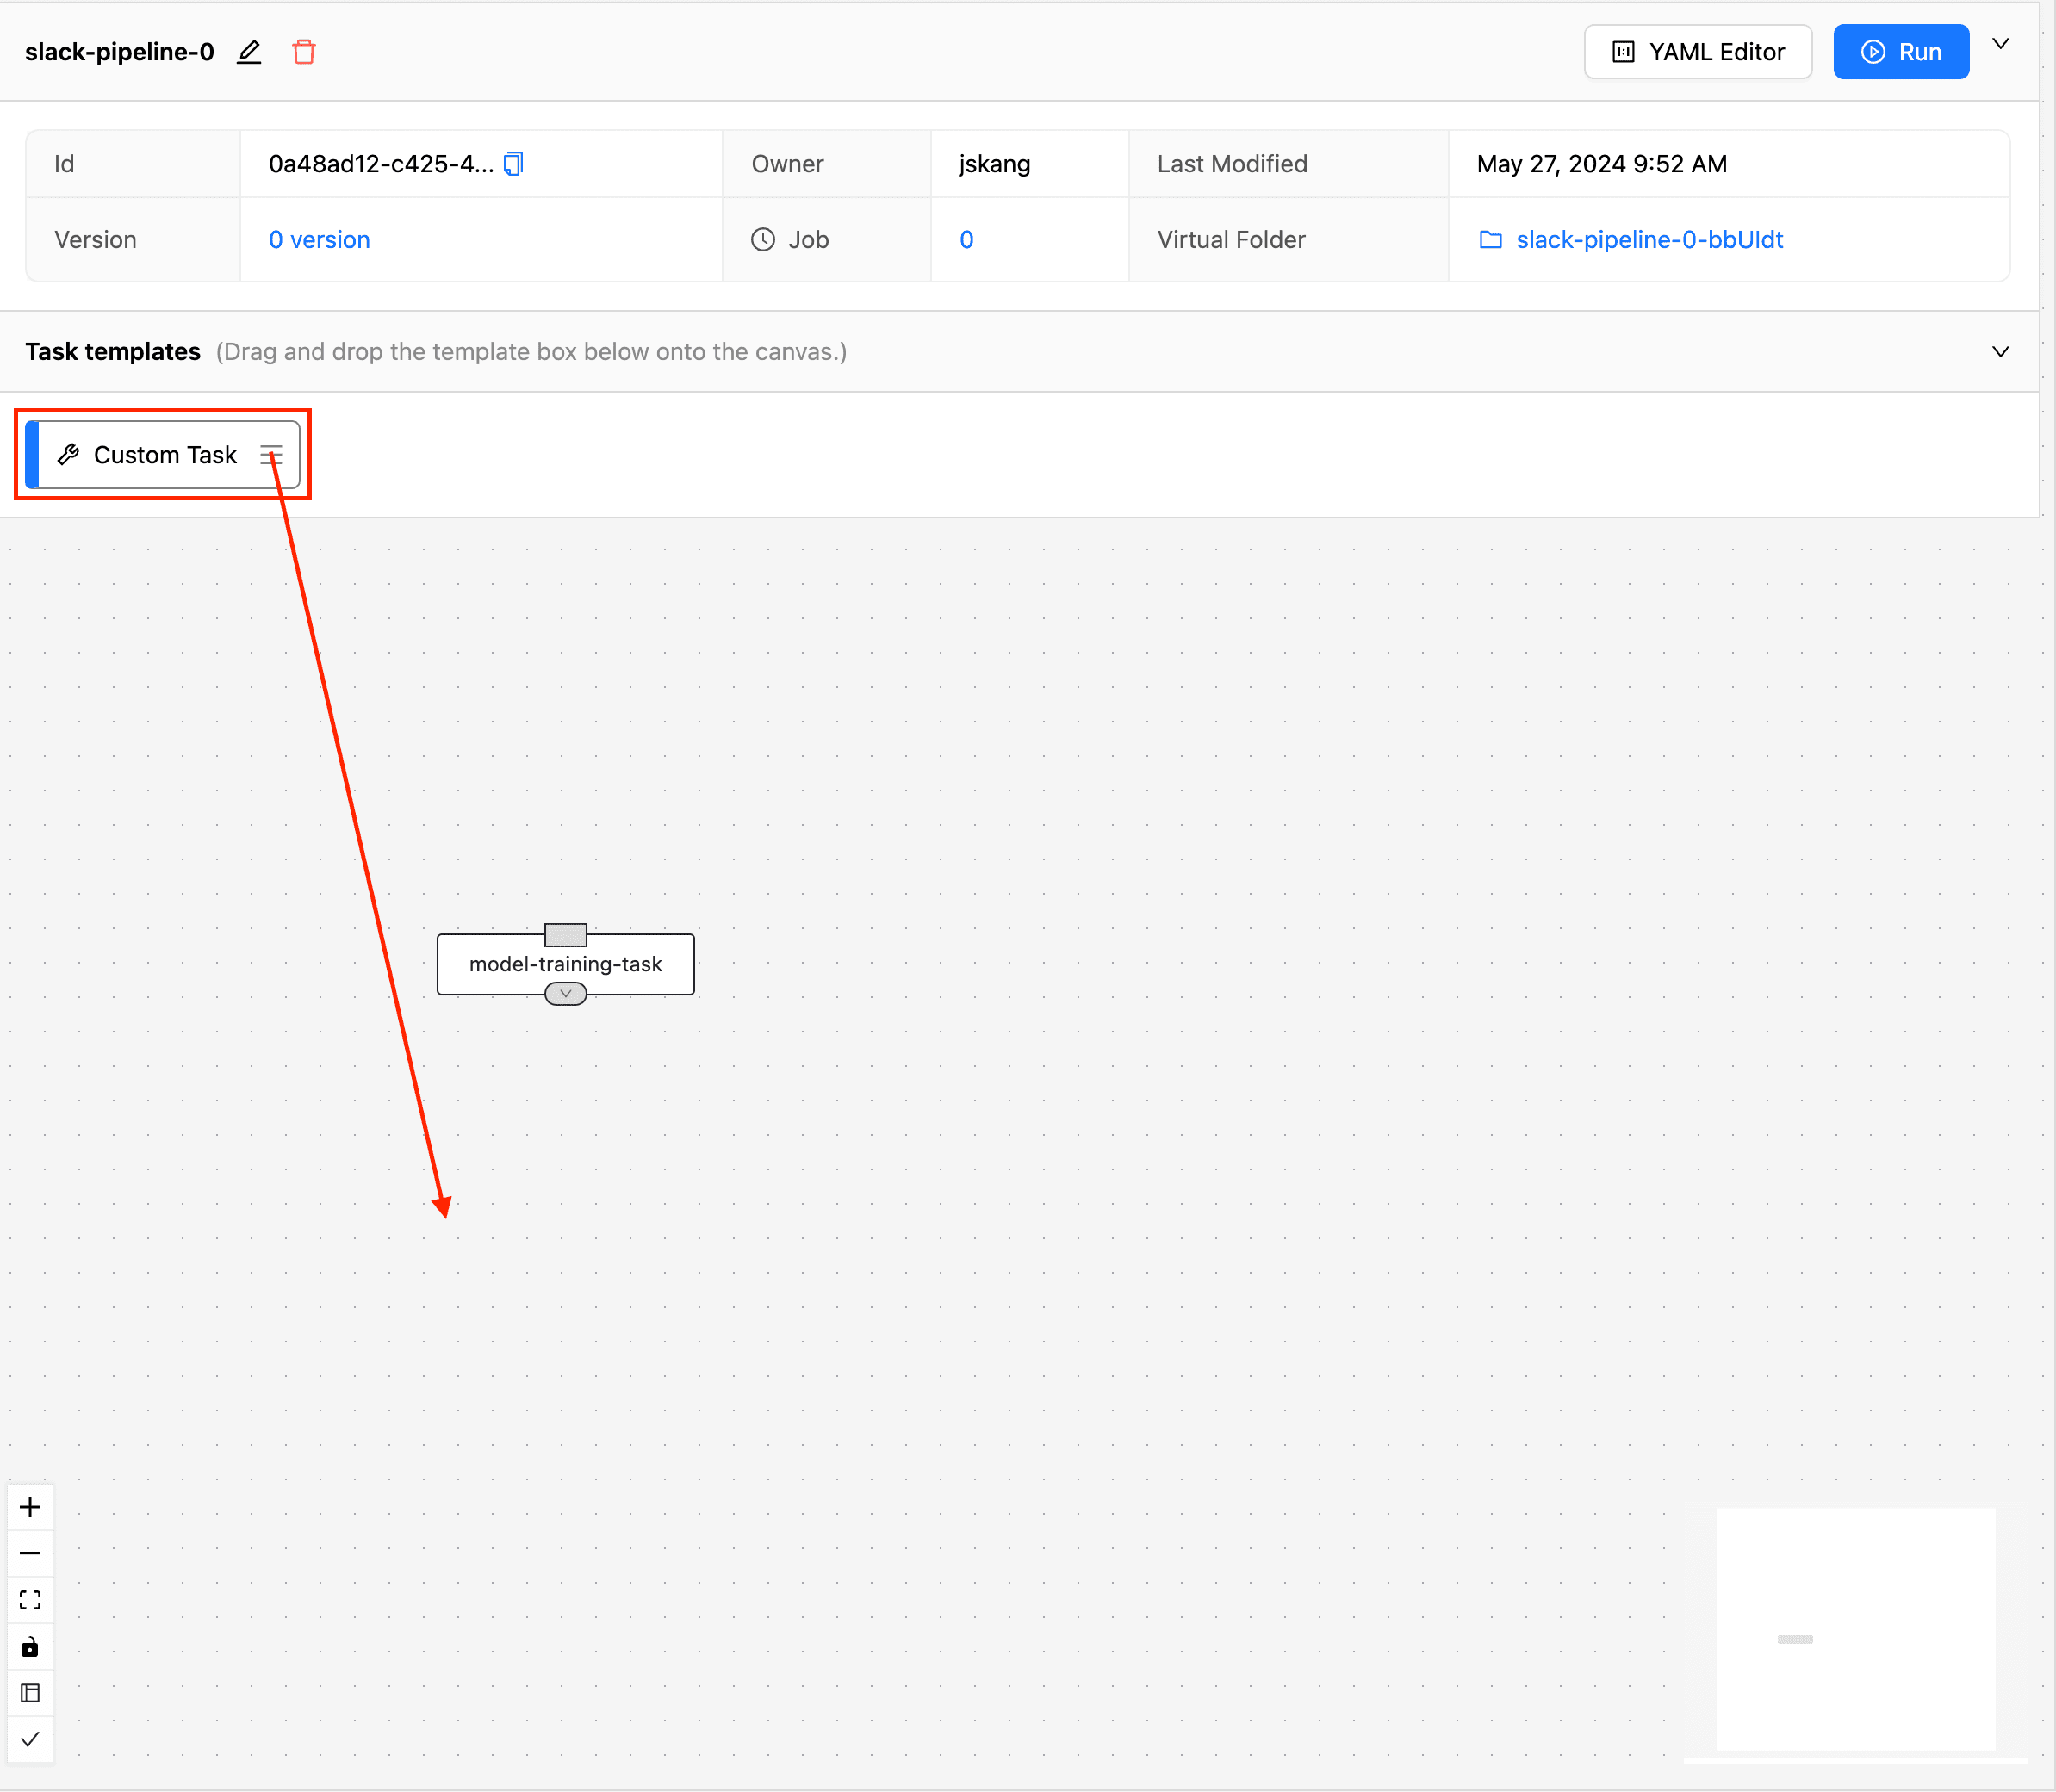
Dragging Another Task
You can see that the model-training-task has been created in the workspace. This time, to create a task that reads the value from the result.txt file saved earlier and sends a Slack notification, drag another "Custom Task" block into the workspace below.
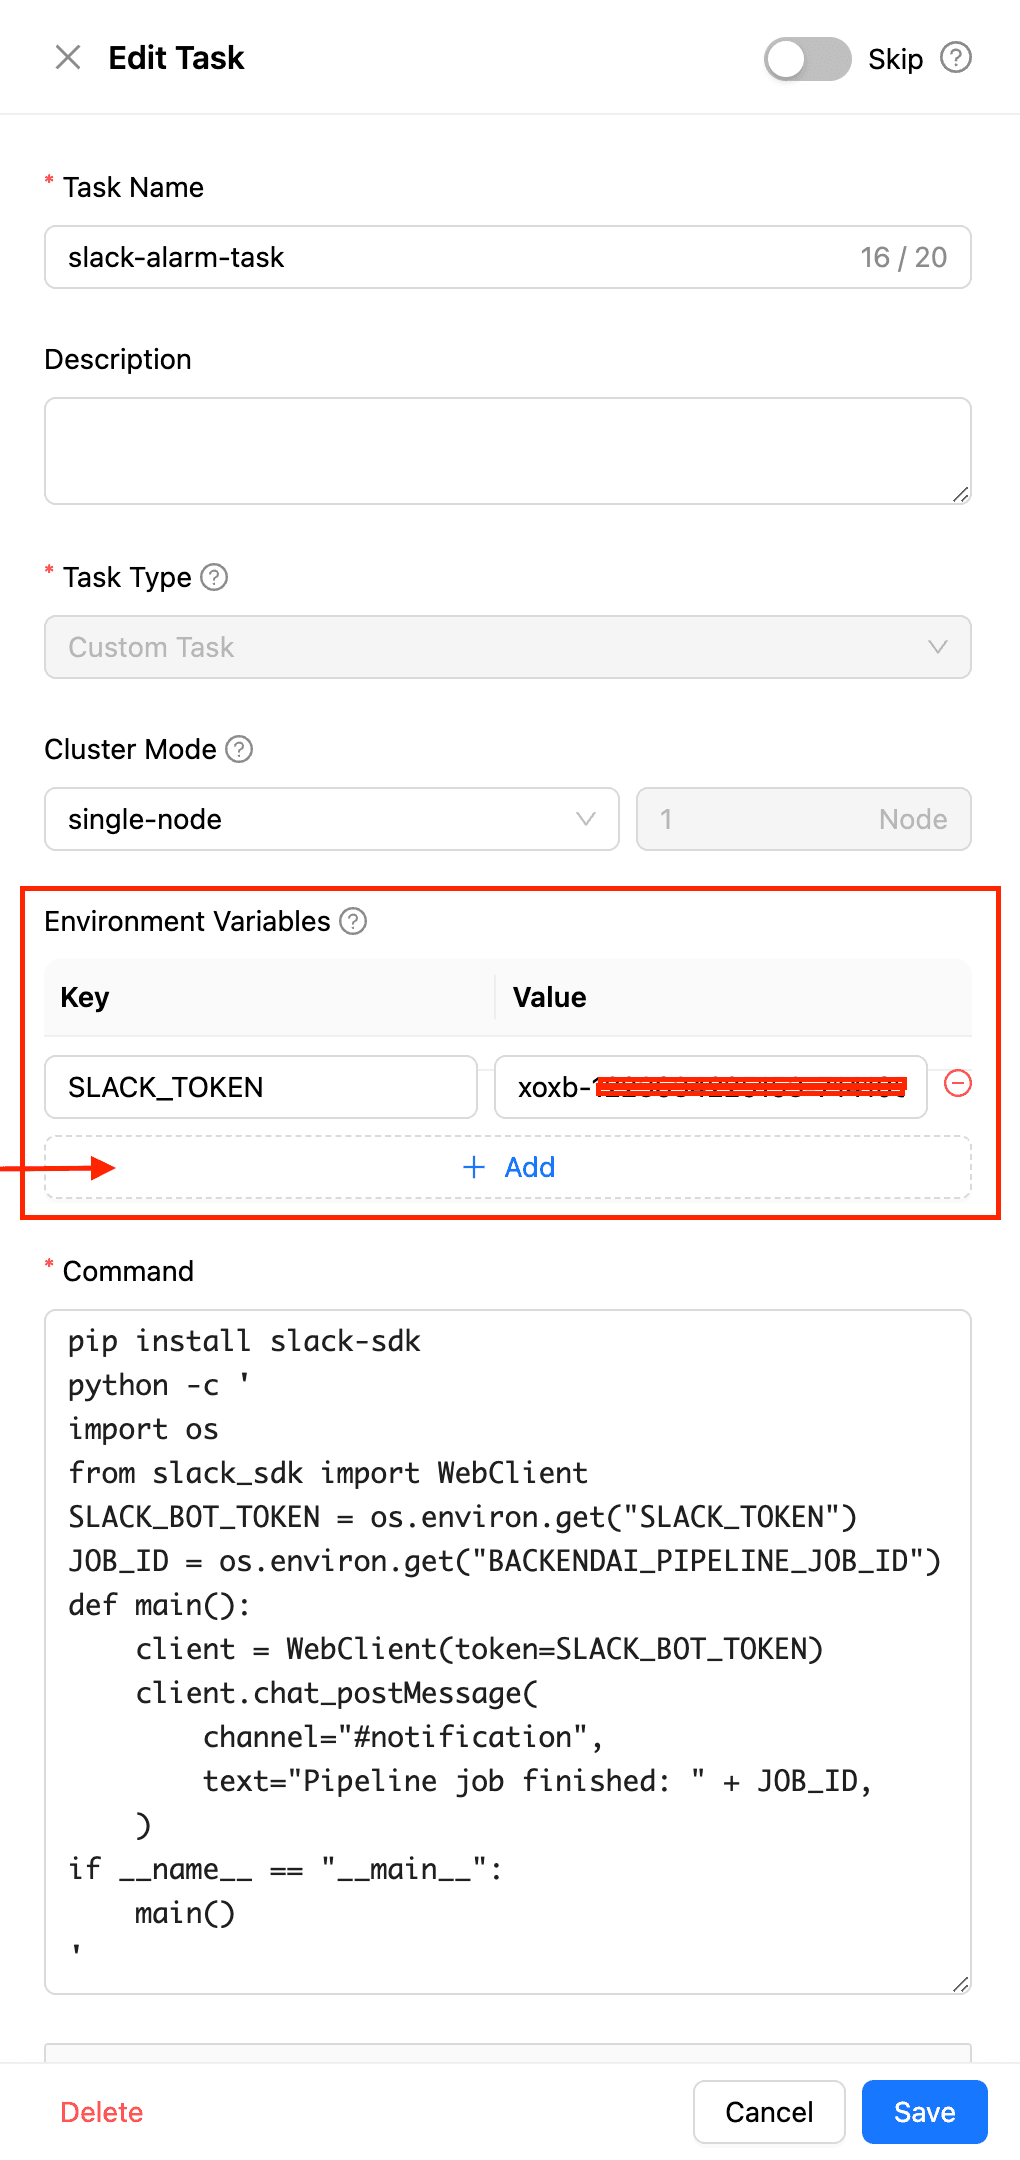
Entering the Task-level Environment Variable `SLACK_TOKEN`
For this task, set the name to slack-alarm-task, and enter the following script to send a notification to Slack:
pip install slack-sdk
python -c '
import os
from pathlib import Path
from slack_sdk import WebClient
SLACK_BOT_TOKEN = os.environ.get("SLACK_TOKEN")
JOB_ID = os.environ.get("BACKENDAI_PIPELINE_JOB_ID")
def main():
    result = Path("/pipeline/input1/result.txt").read_text()
    client = WebClient(token=SLACK_BOT_TOKEN)
    client.chat_postMessage(
        channel="#notification",
        text="Pipeline job({}) finished with accuracy {}".format(JOB_ID, result),
    )
if __name__ == "__main__":
    main()
'
The code above uses two environment variables: SLACK_TOKEN and BACKENDAI_PIPELINE_JOB_ID. Environment variables in the BACKENDAI_* format are values automatically added by the Backend.AI and FastTrack systems, where BACKENDAI_PIPELINE_JOB_ID represents the unique identifier of the pipeline job in which each task is running.
The other environment variable, SLACK_TOKEN, is a task-level environment variable. This feature allows you to manage and change various values without modifying the code.
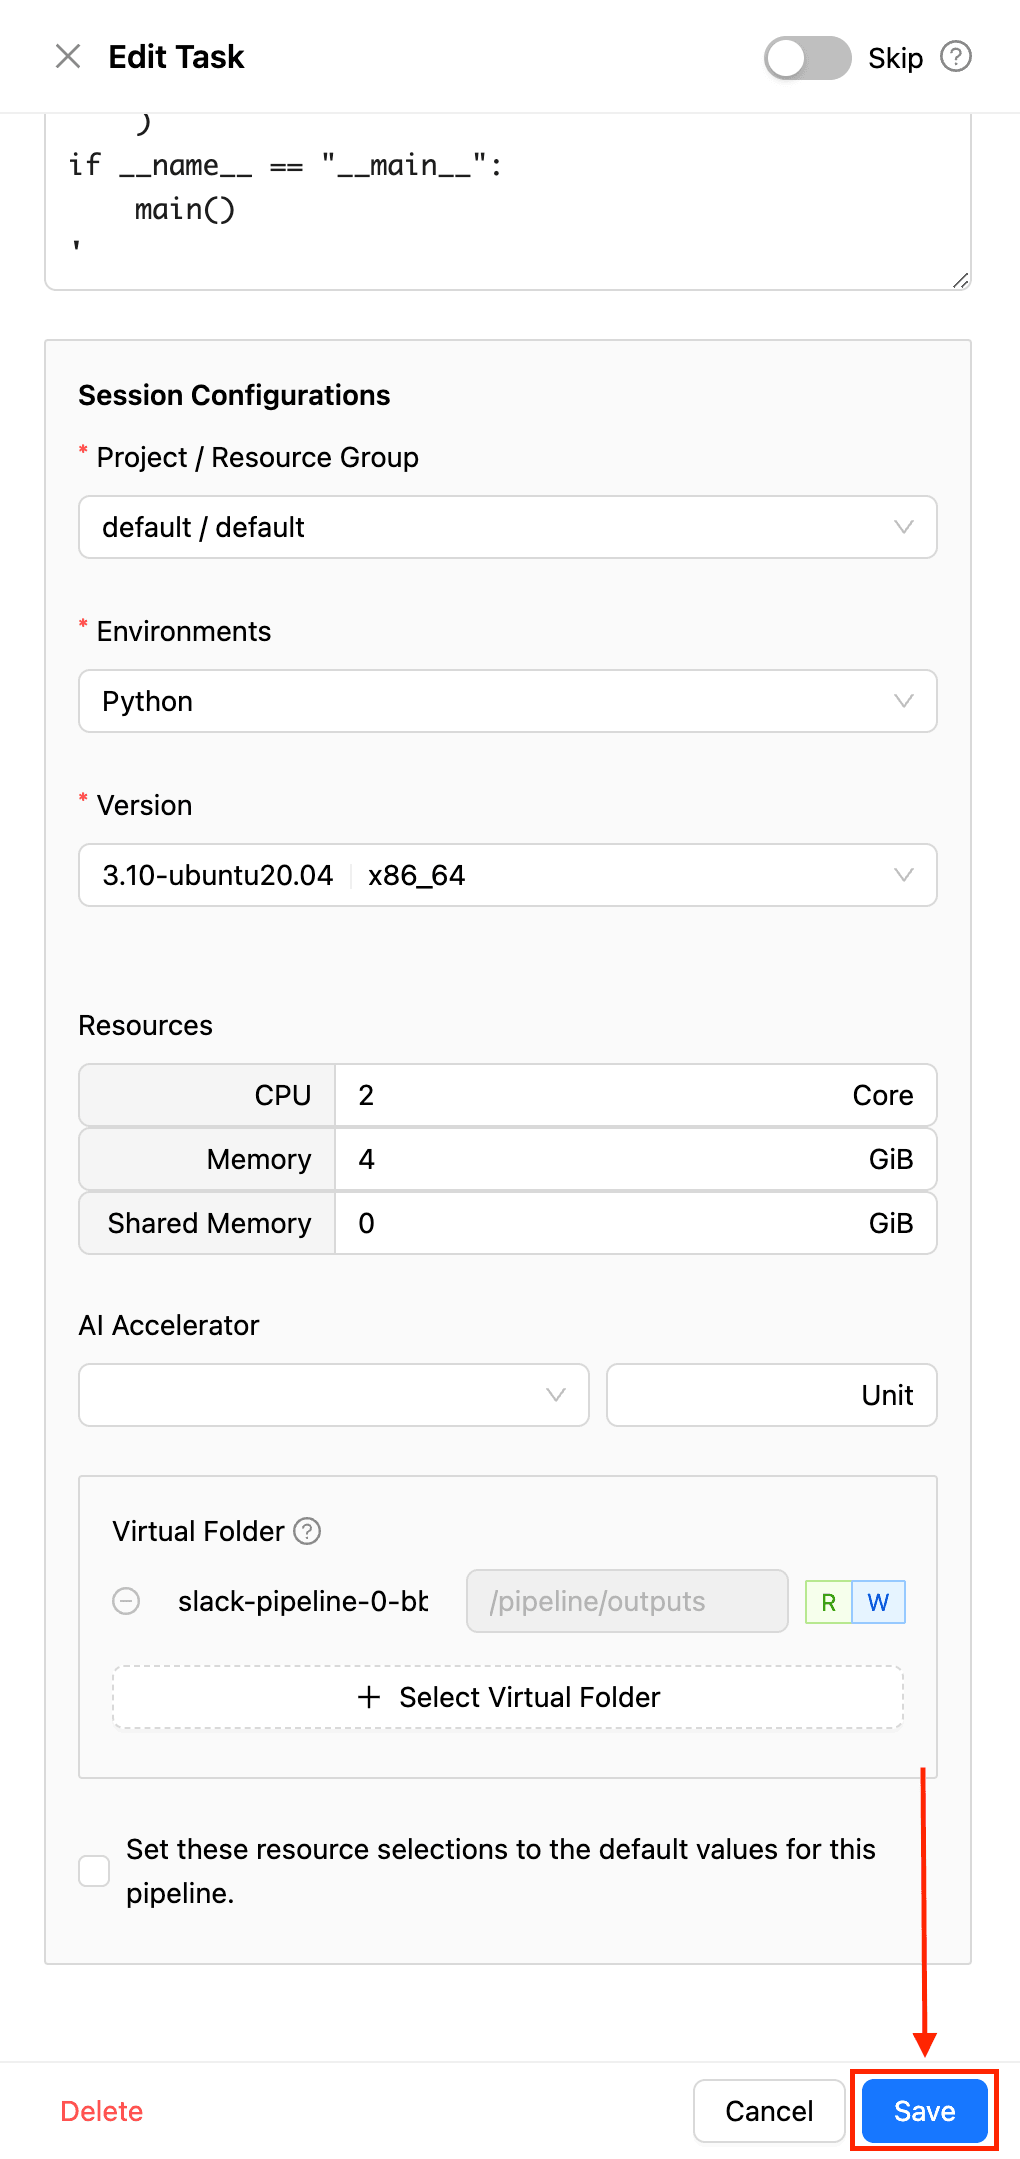
Creating a Task (2)
After allocating appropriate resources for the slack-alarm-task, click the "Save" button at the bottom to create the task.
Adding Task Dependencies
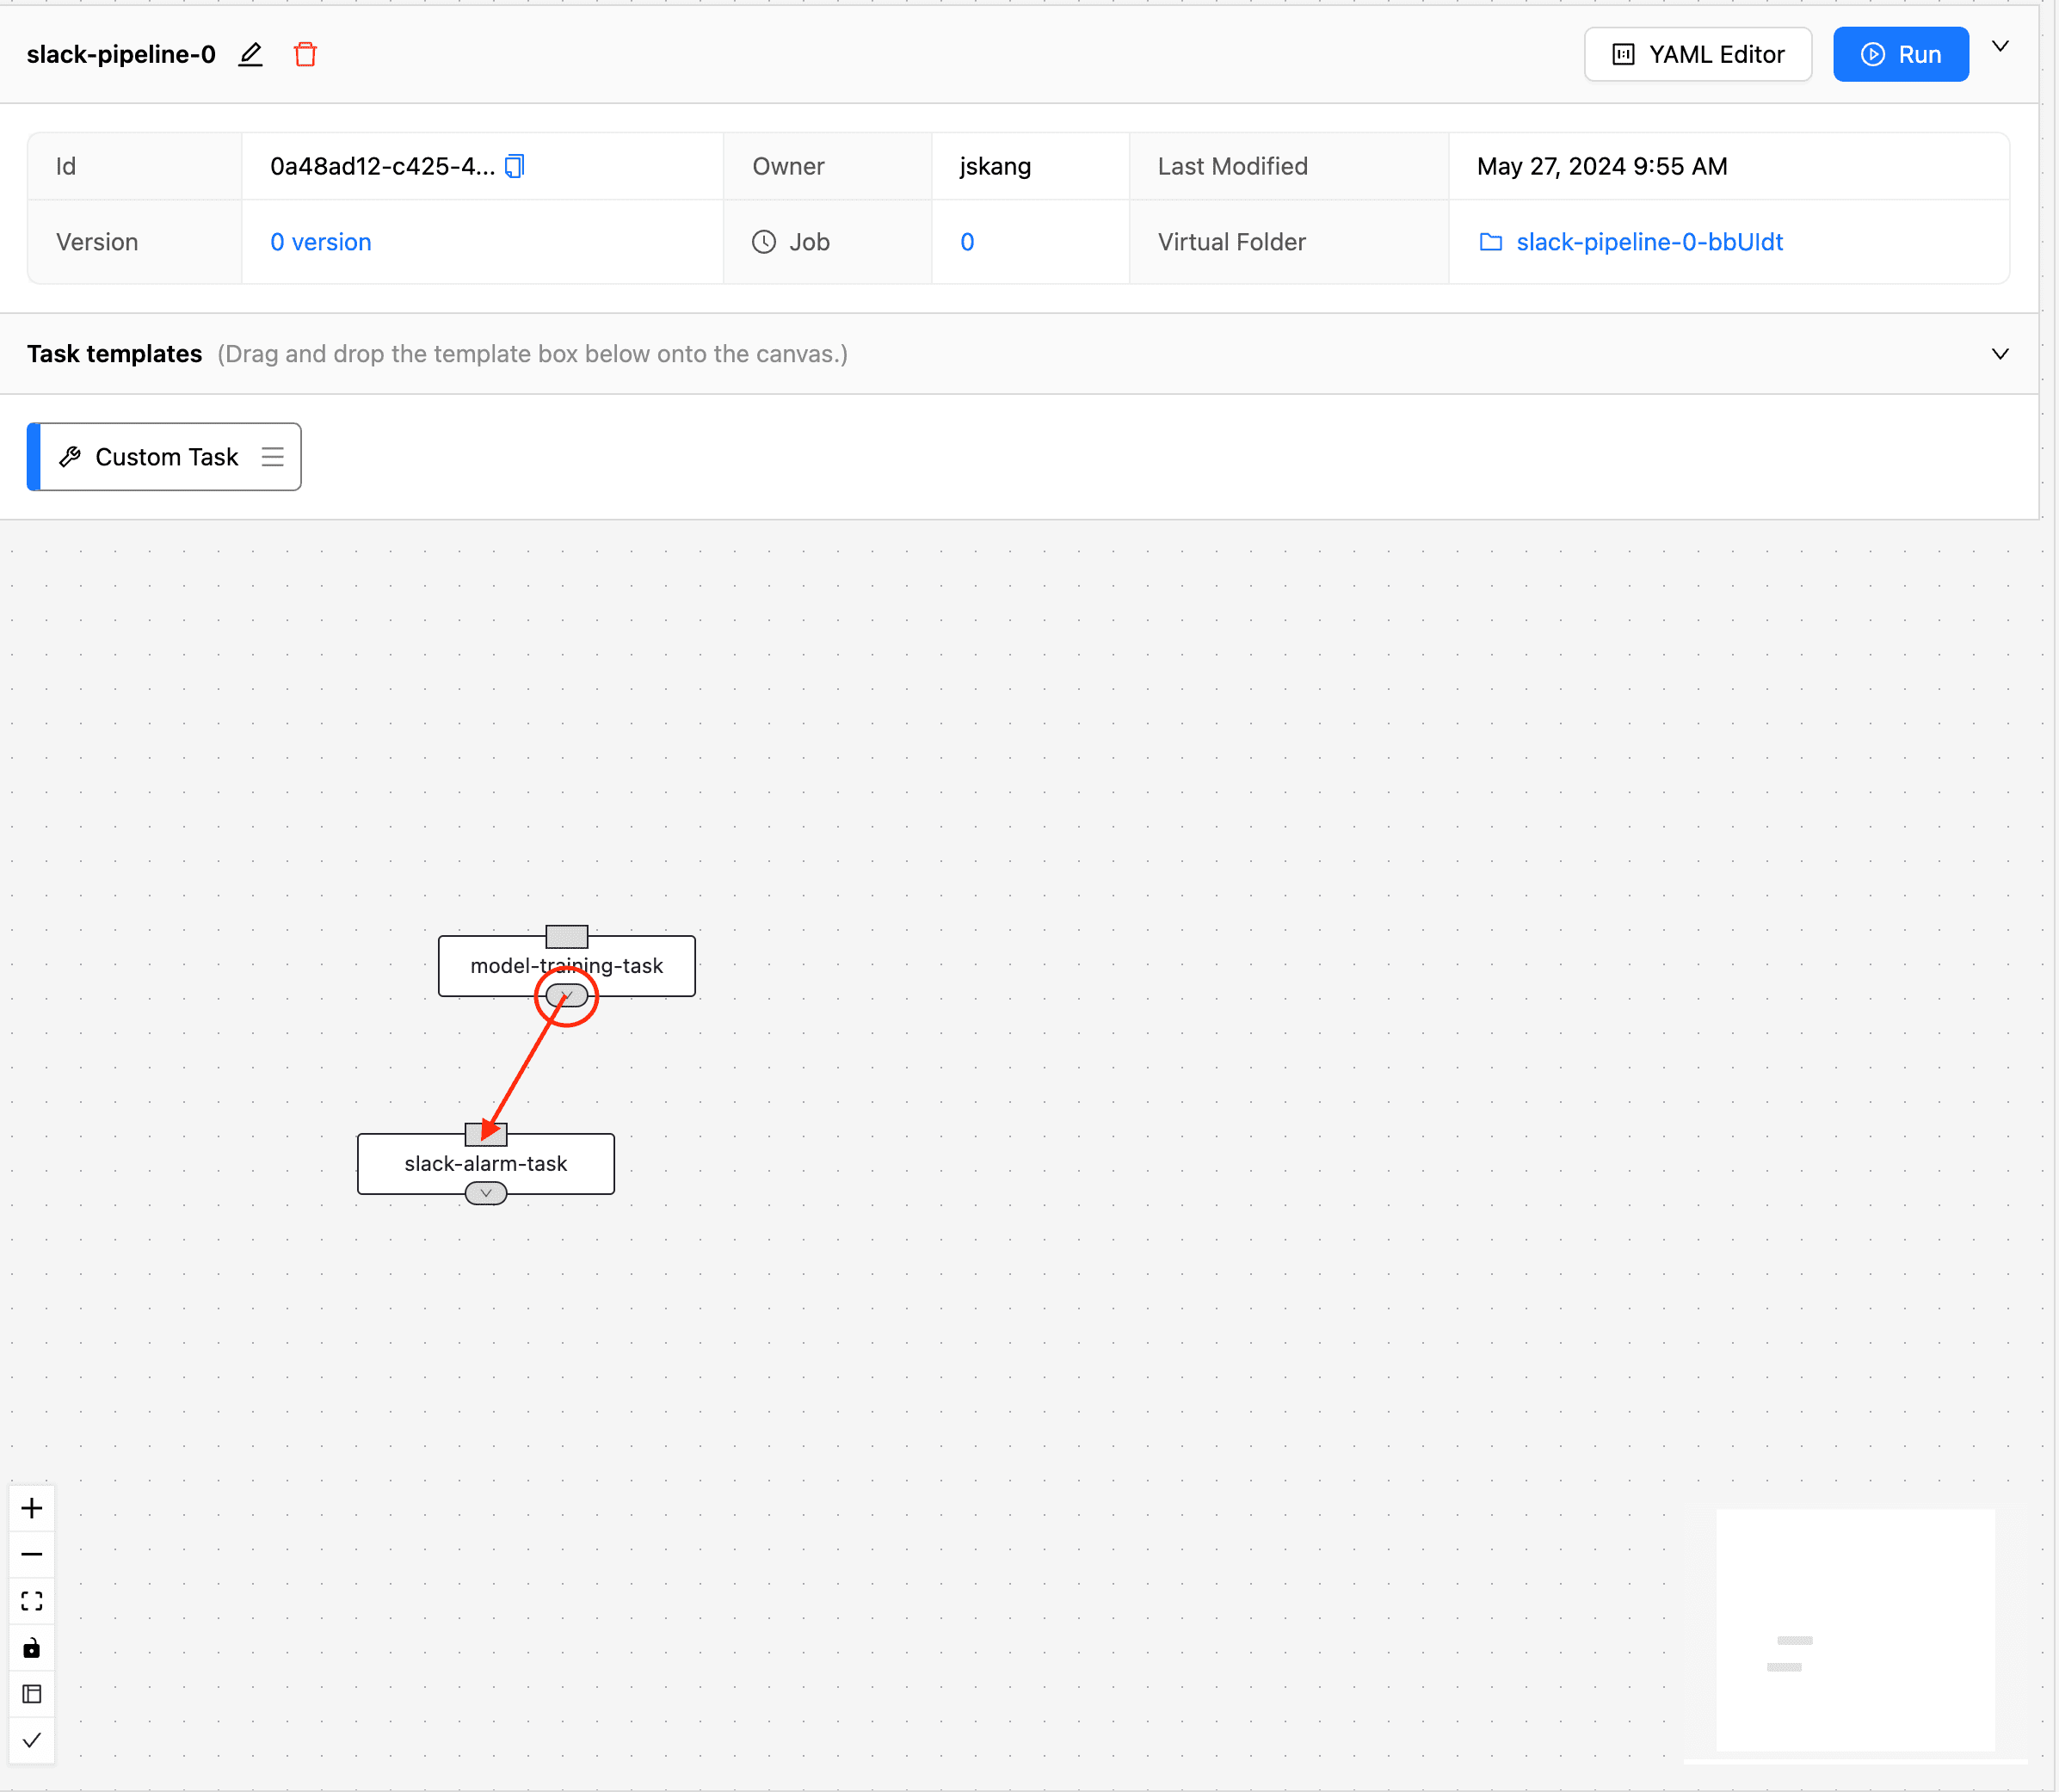
Adding Task Dependencies
Now there are two tasks (model-training-task and slack-alarm-task) in the workspace. Since slack-alarm-task should be executed after model-training-task completes, we need to add a dependency between the two tasks. Drag the mouse from the bottom of the task that should run first (model-training-task) to the top of the task that should run later (slack-alarm-task).
Running the Pipeline
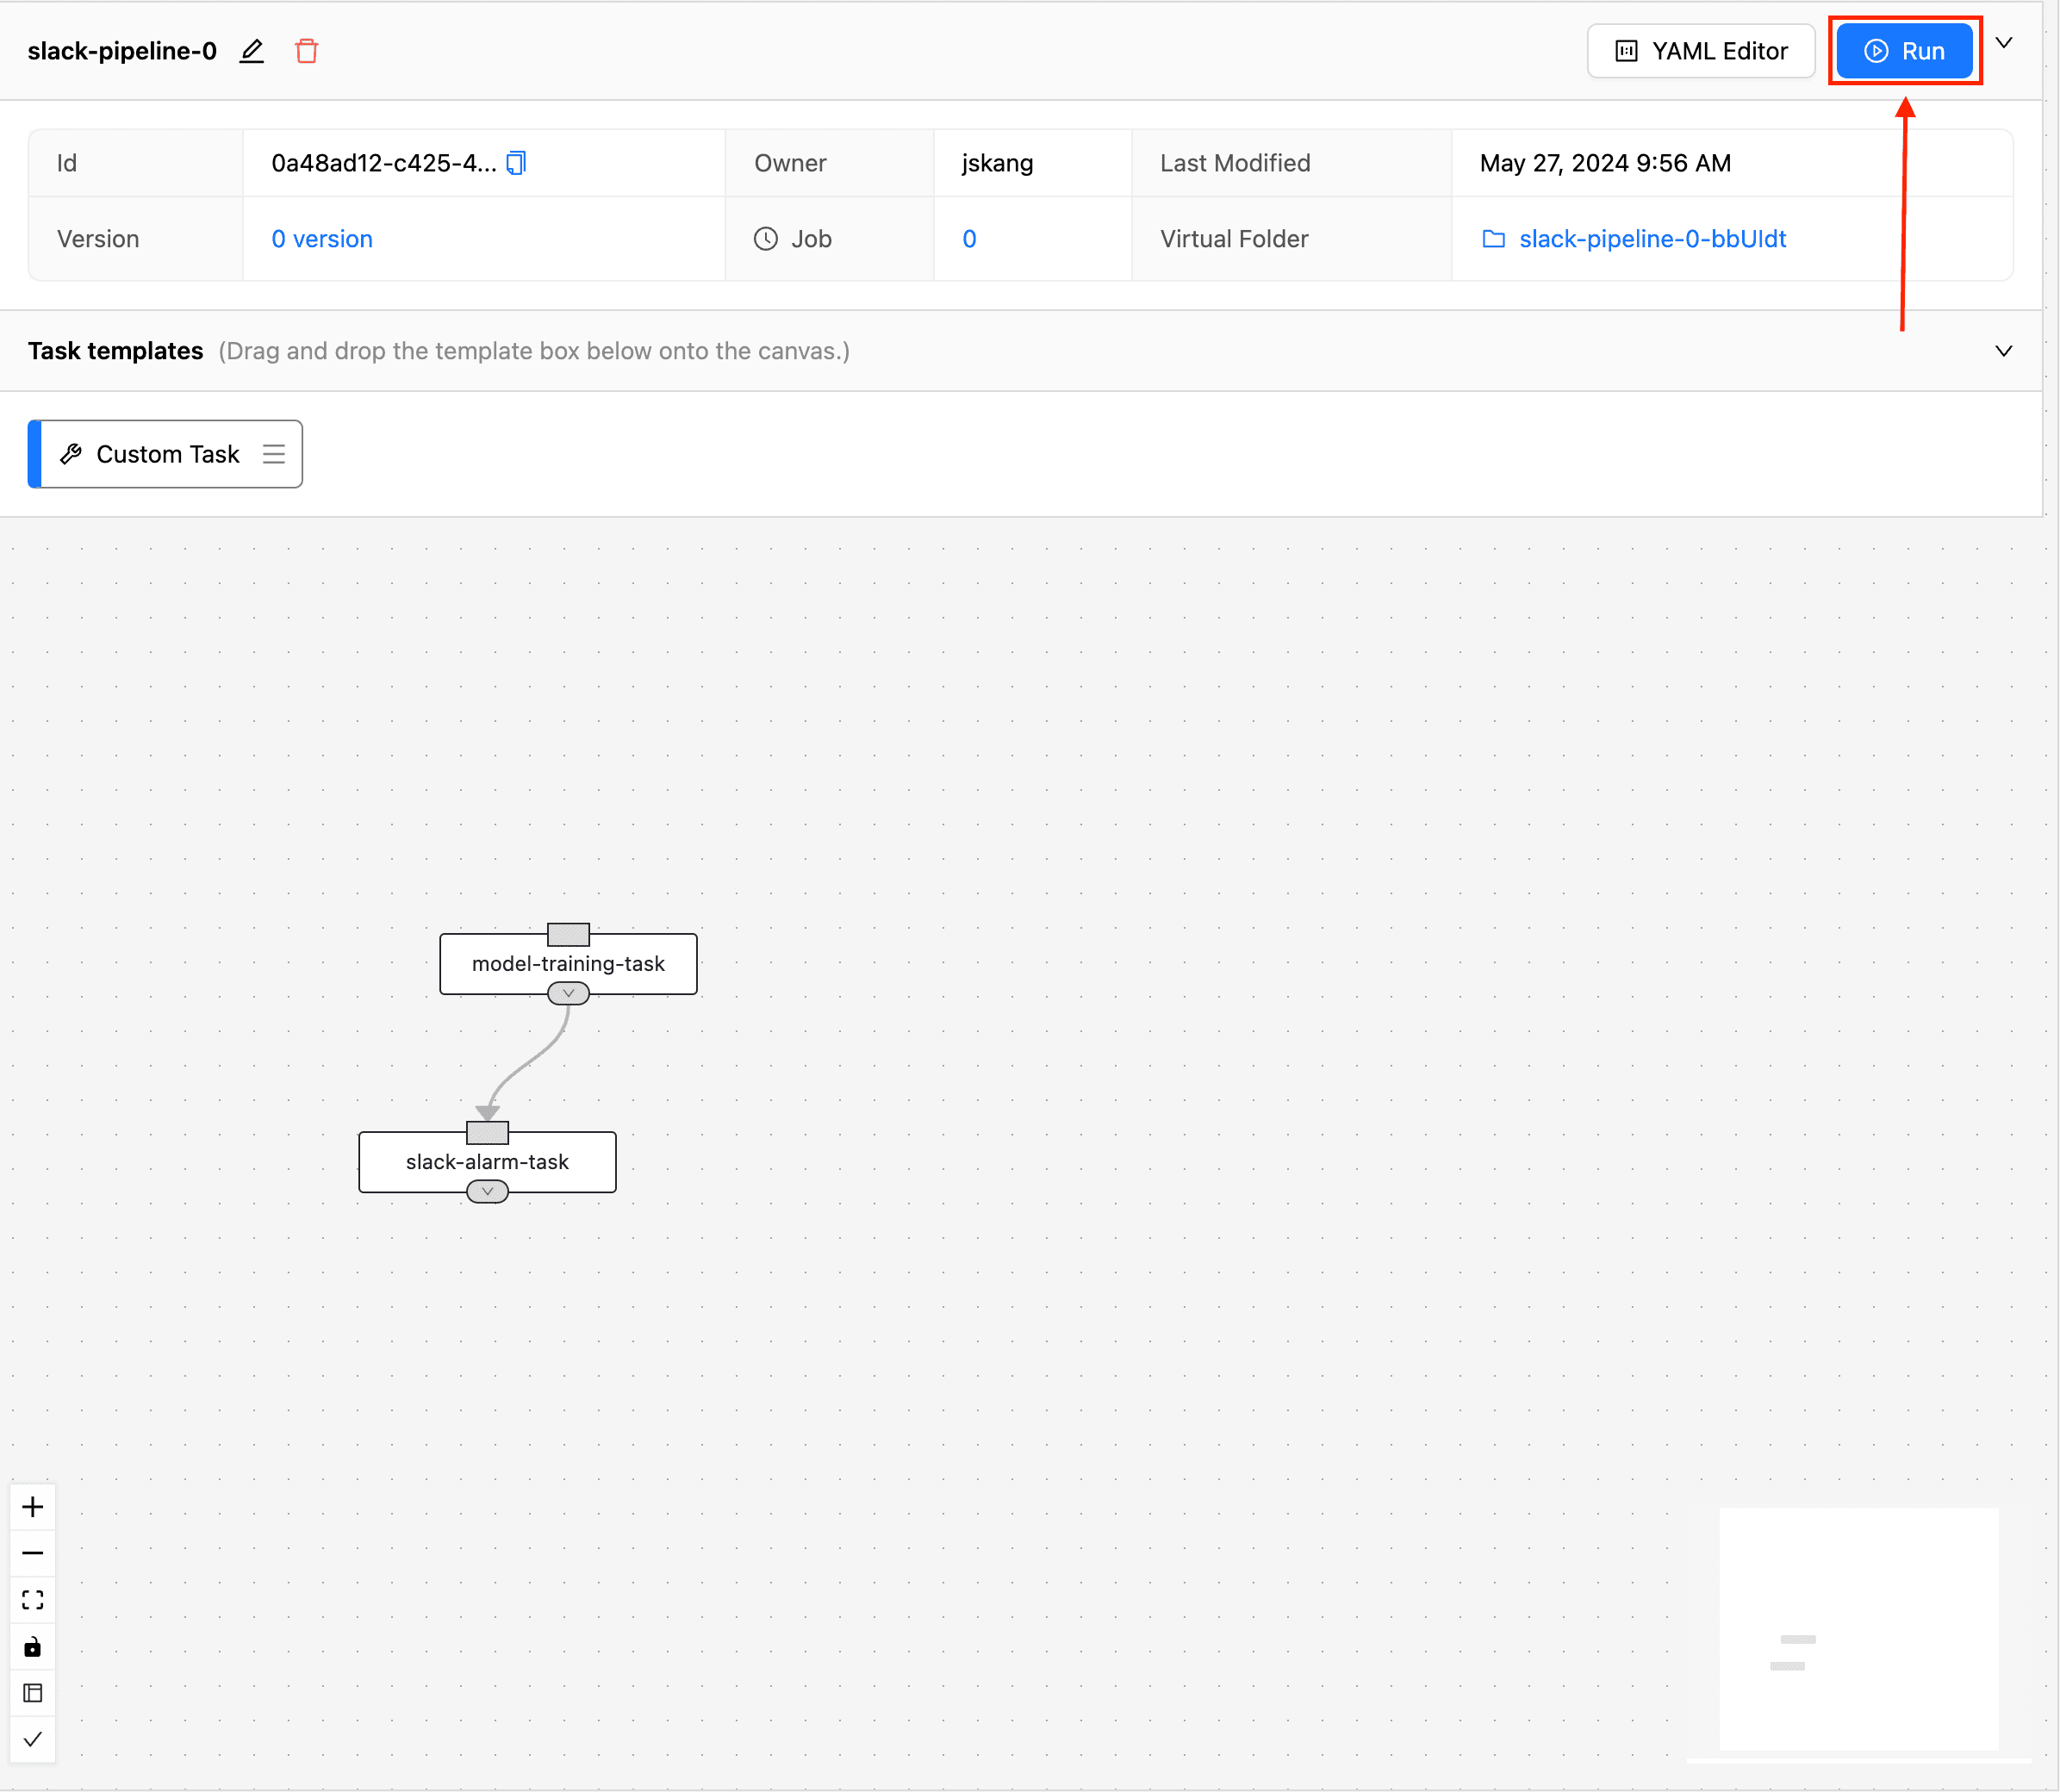
Running the Pipeline (1)
You can see an arrow connecting from model-training-task to slack-alarm-task, indicating that the dependency has been added. Now, to run the pipeline, click the "Run" button in the top right.
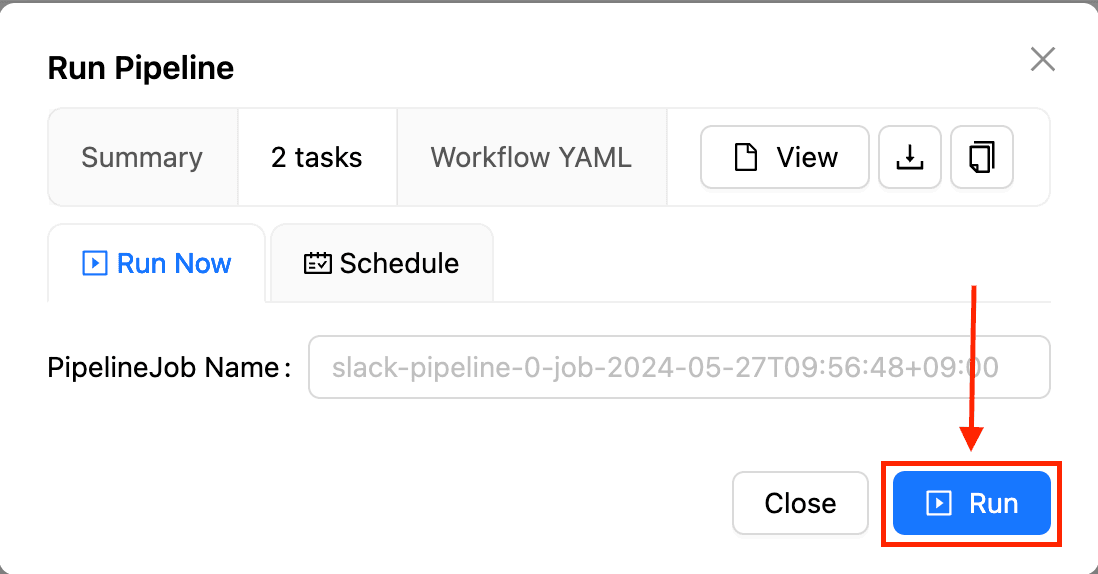
Running the Pipeline (2)
Before running the pipeline, you can review a brief summary of it. After confirming the presence of the two tasks, click the "Run" button at the bottom.
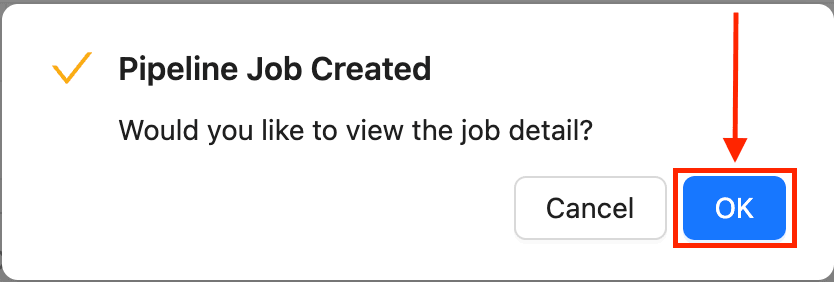
Running the Pipeline (3)
The pipeline was successfully run, and a pipeline job was created. Click "OK" at the bottom to view the pipeline job information.
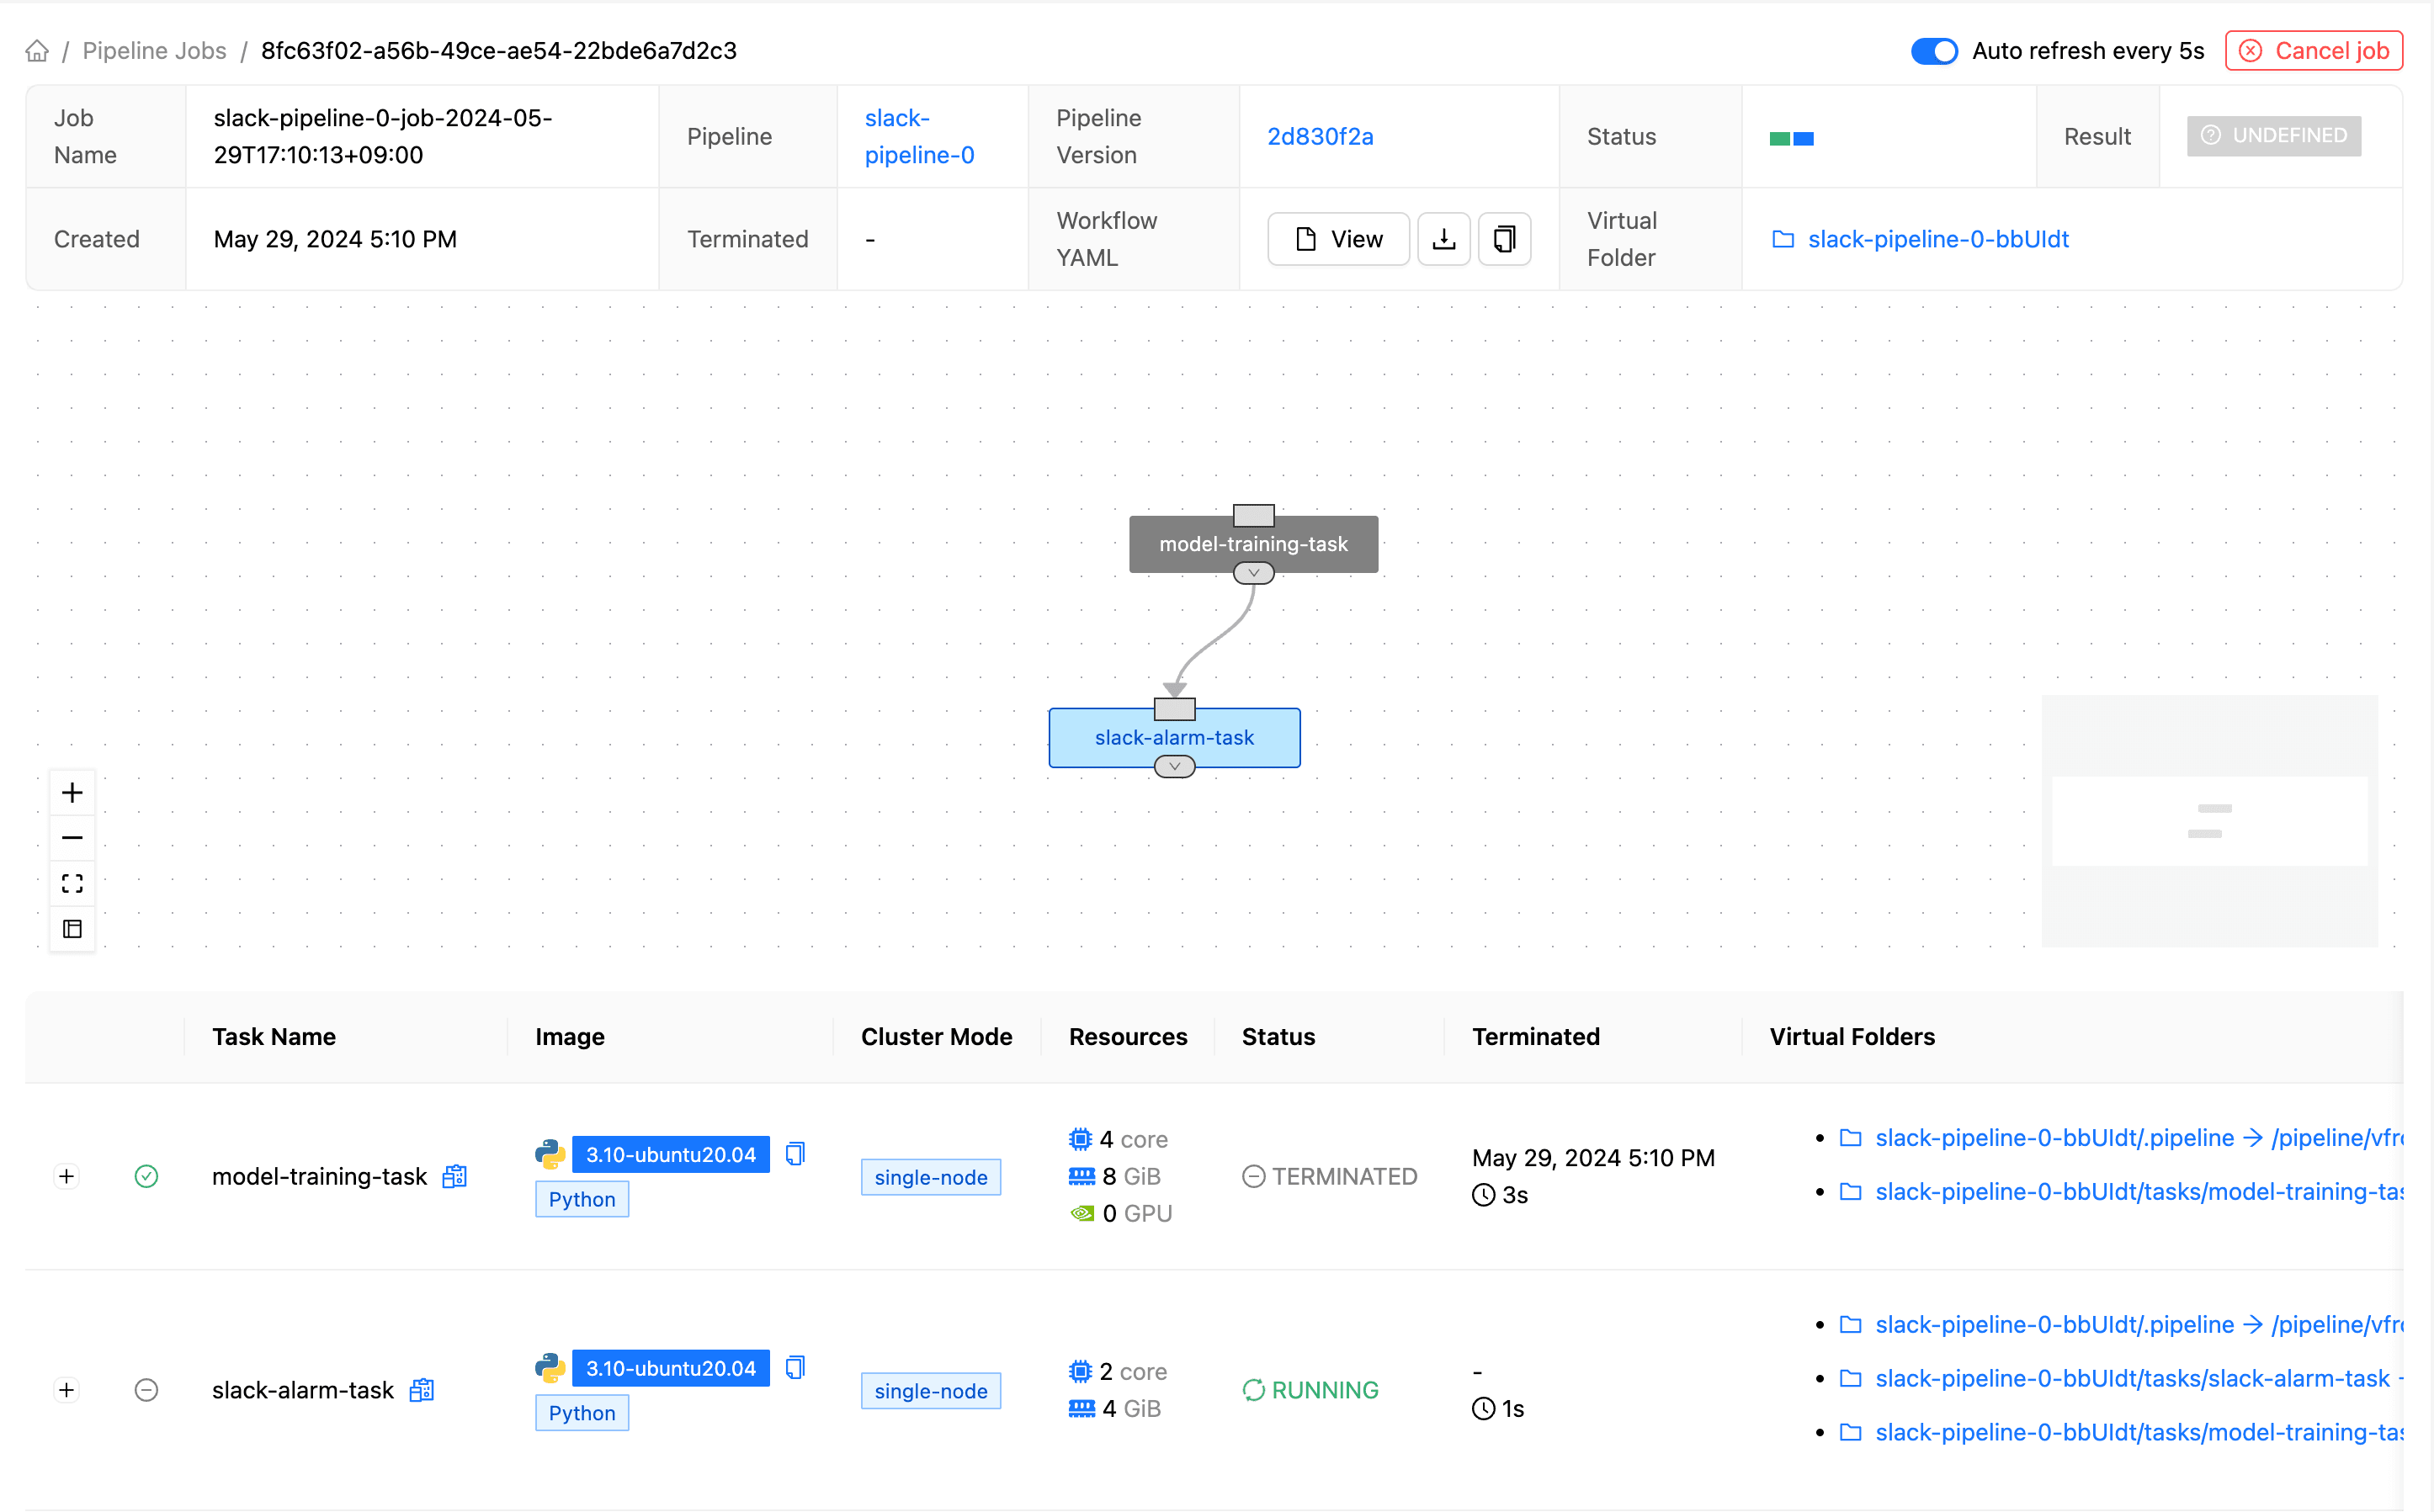
Pipeline Job
The pipeline job was created successfully. You can see that the model training (model-training-task) has completed, and slack-alarm-task is running.
Receiving Slack Notification
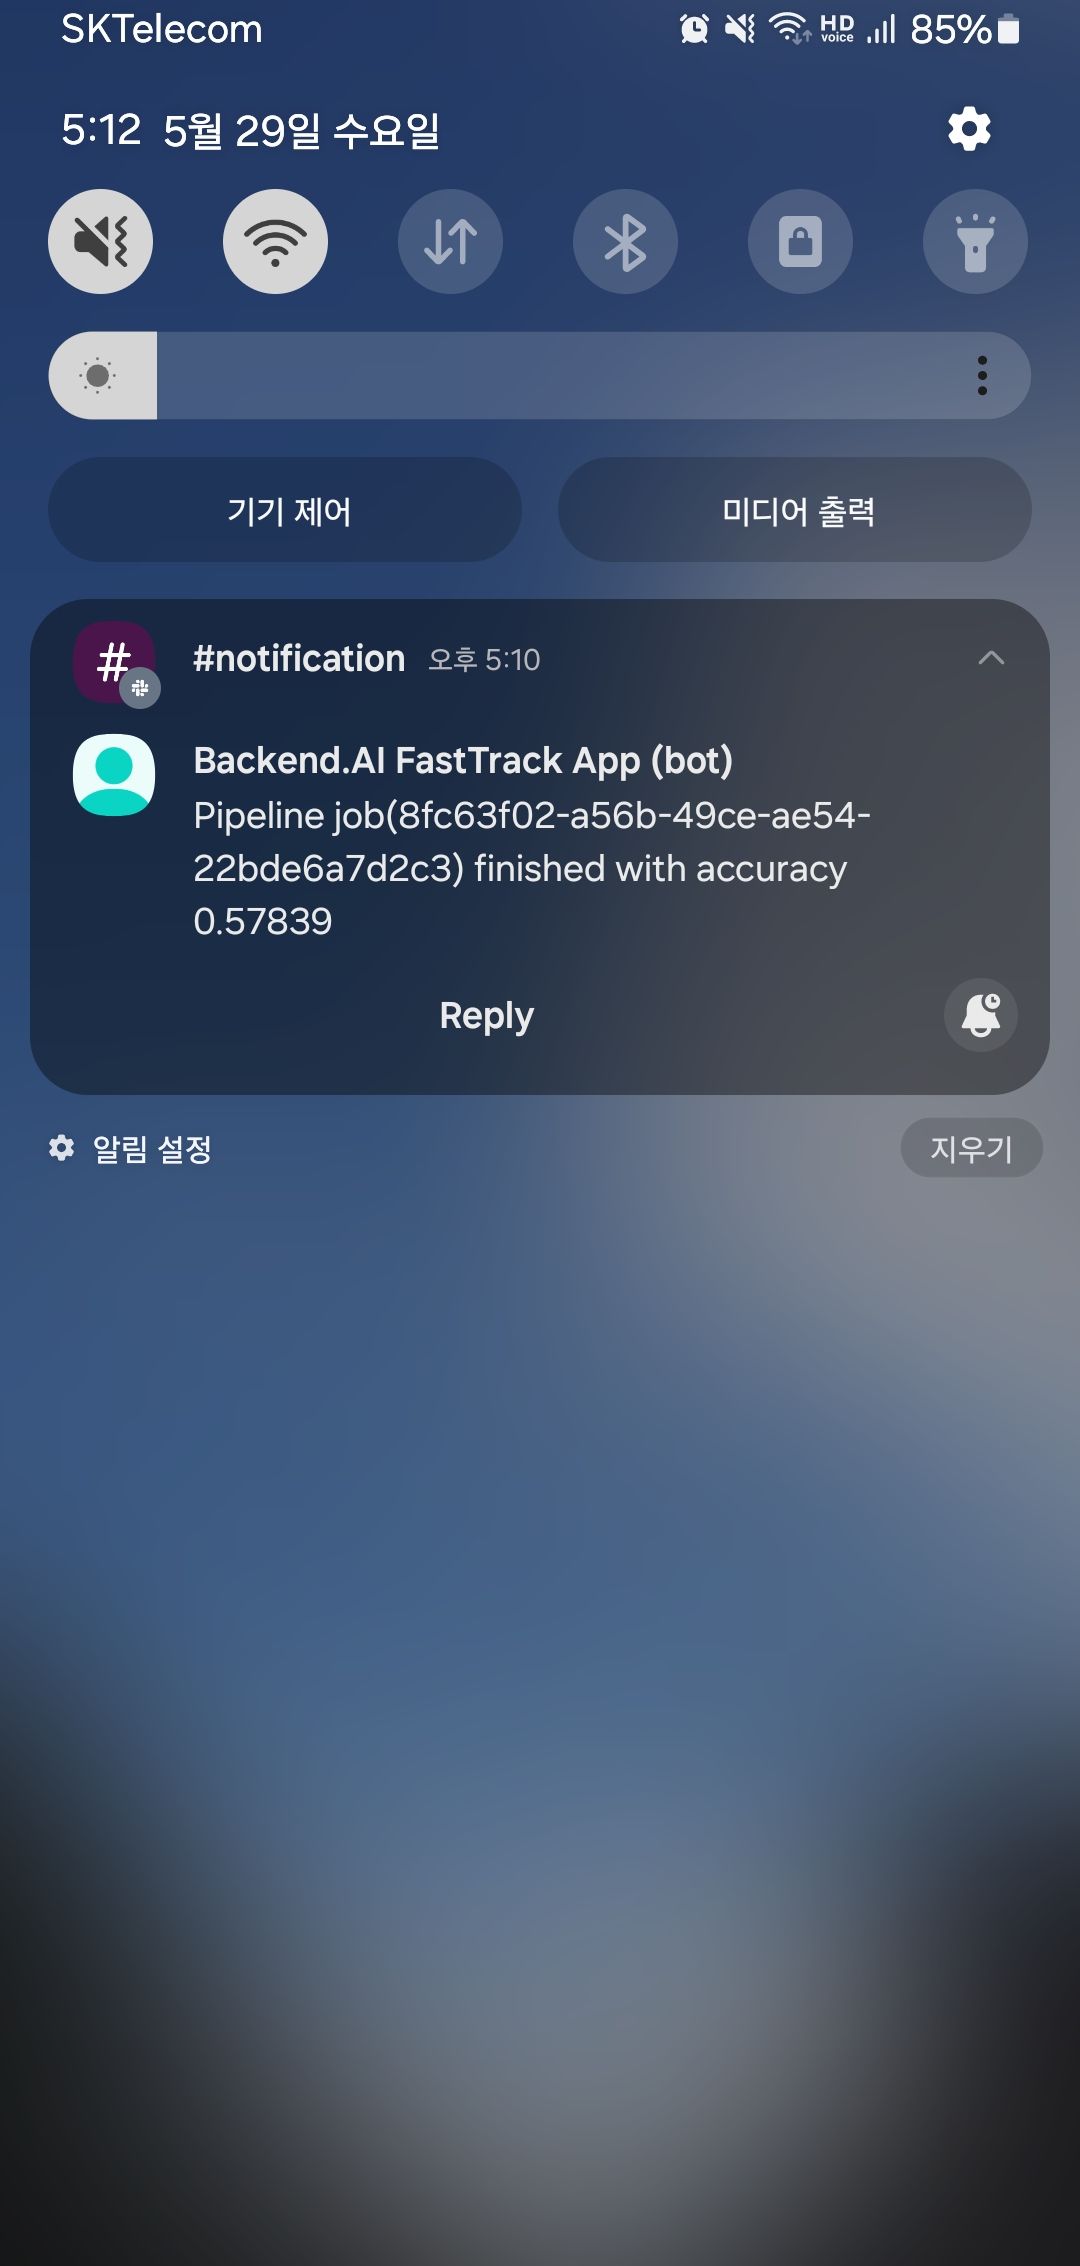
Slack Notification (1)
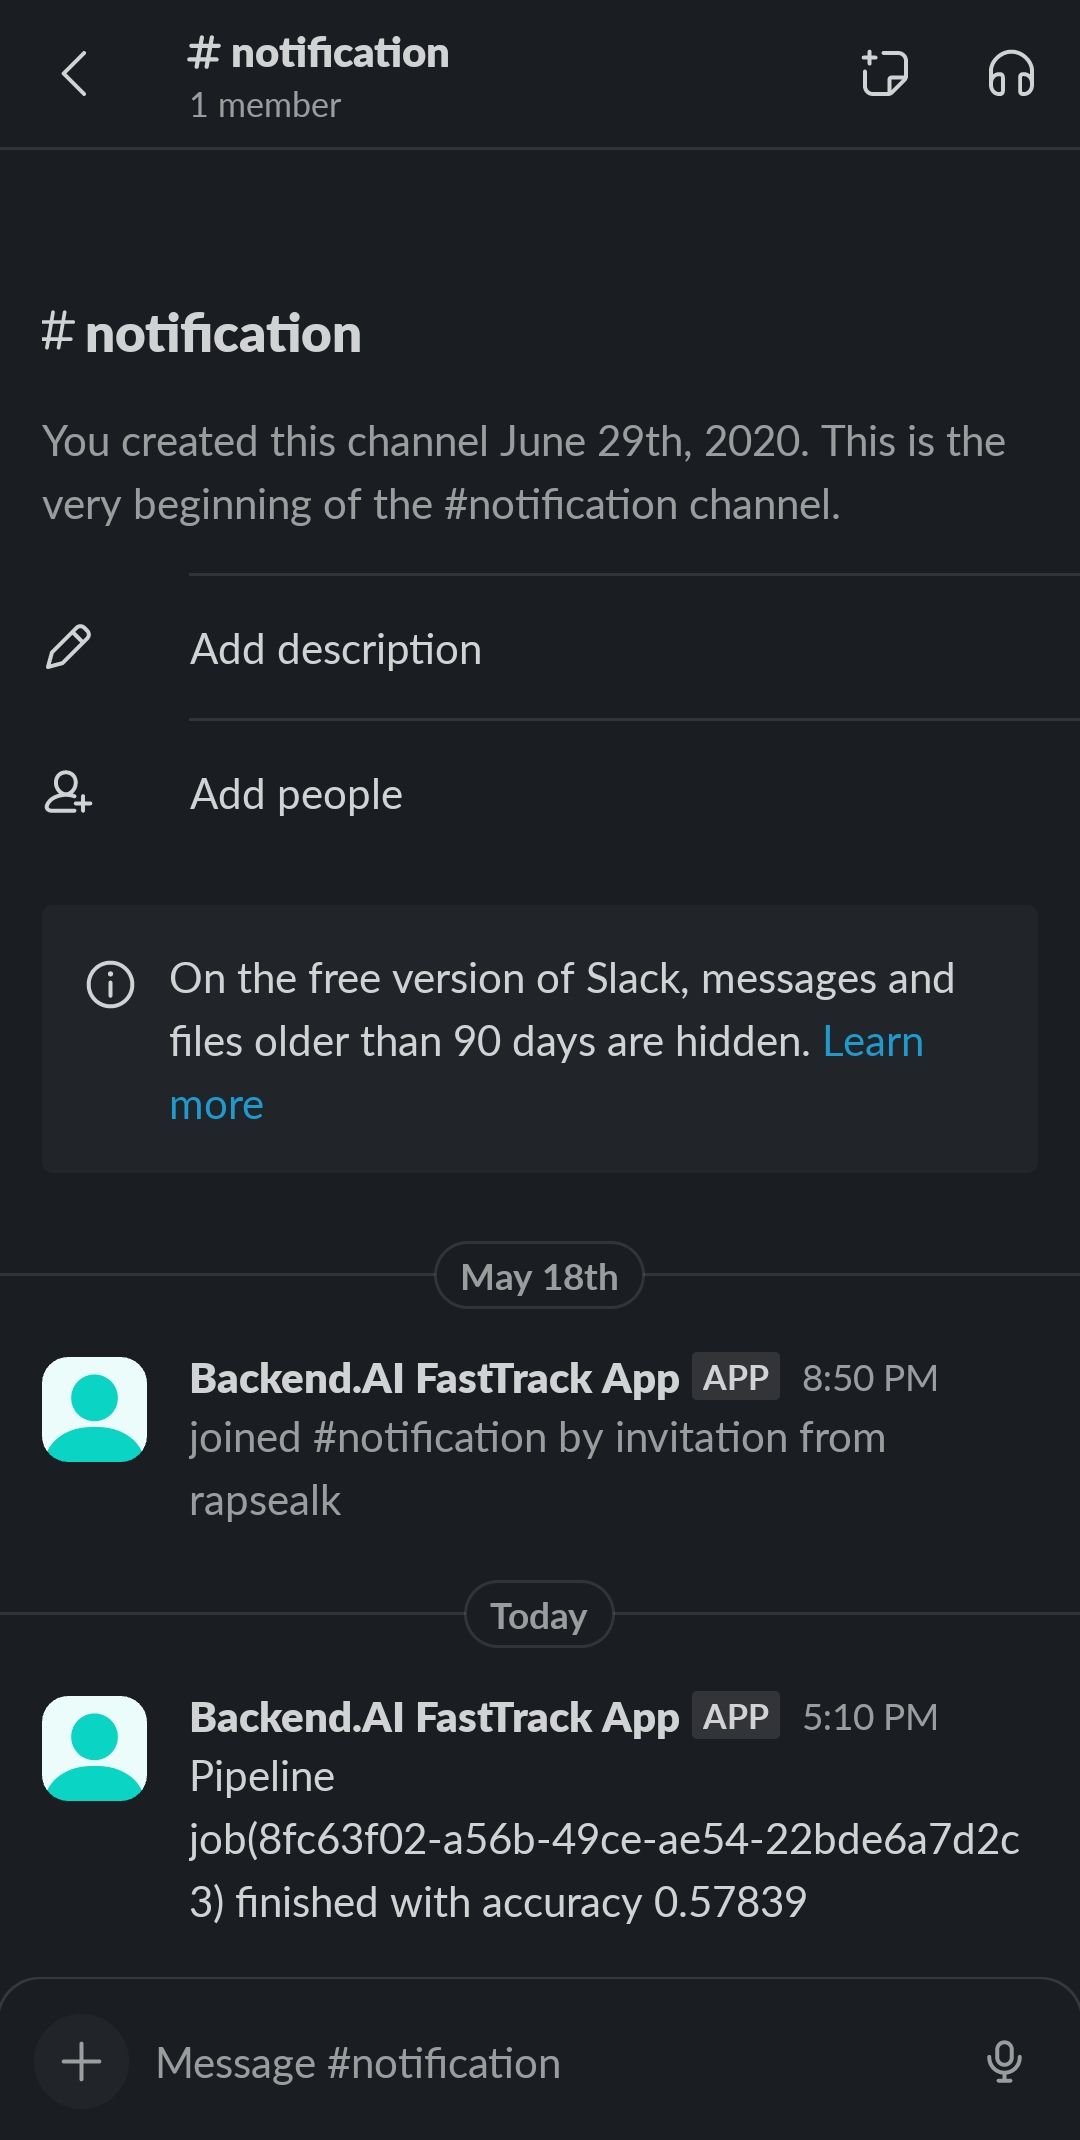
Slack Notification (2)
You can see that the pipeline job execution results have been delivered to the user via Slack. Now we can sleep soundly.


